How to Create an S3 Bucket on AWS, and how to secure it.
Here is a beginner’s guide on how to use and create S3 Bucket on AWS. Before we start, let’s very quickly recap what S3 is and what different types of S3 tiers are available.
Launched in 2006 as AWS’s first service, Amazon S3 revolutionized cloud storage by providing a scalable, durable, and cost-effective way to store and access data, evolving over time to become a cornerstone of modern cloud-native applications and data-driven initiatives. S3 Stands for Simple Storage Service (S3).
What is Amazon S3 (Simple Storage Service)?
Amazon S3 is a global scale object storage solution, it is essentially a scalable storage container in the cloud. You can store all sorts of objects in it – documents, images, videos, backups. You can even host website files from S3.
It’s known for being:
- Highly durable: Your data is protected from hardware failures and is spread across multiple facilities.
- Scalable: You can store a few megabytes or petabytes of data. S3 grows with your needs.
- Secure: You have fine-grained control over who can access your data.
- Cost-effective: S3 offers various storage classes (tiers) to match your performance and cost requirements.
S3 Storage Classes (Tiers):
S3 is available in different storage classes, what this means that different types of storage are available. Each type has a different use case. The most common storage type is S3 Standard, but you may come across S3 Glacier Storage which is used for long term storage.
Here is a breakdown of all the storage tiers available. Remember, the core difference is “standard” and “glacier”.
- S3 Standard: The go-to for frequently accessed data. Offers high durability and availability.
- S3 Intelligent-Tiering: Automatically moves your data between tiers based on access patterns – great if you’re unsure of your usage.
- S3 Standard-Infrequent Access (S3 Standard-IA): For less frequently accessed data. Lower storage costs, but you pay a small fee for each retrieval.
- S3 One Zone-Infrequent Access (S3 One Zone-IA): Even lower cost than S3 Standard-IA, but your data is stored in a single availability zone (less redundancy).
- S3 Glacier Instant Retrieval: For archival data, you need to access it within milliseconds.
- S3 Glacier Flexible Retrieval (formerly S3 Glacier): This is the lowest-cost option for long-term archives and backups, but data retrieval takes hours.
- S3 Glacier Deep Archive: Lowest cost storage for data that is rarely accessed and can tolerate retrieval times in hours.
Step-by-Step Guide to Create S3 Bucket :
Step 1: Log into AWS
- Go to the AWS website (aws.amazon.com).
- Enter your AWS account email address and password.
- Click “Sign In.”
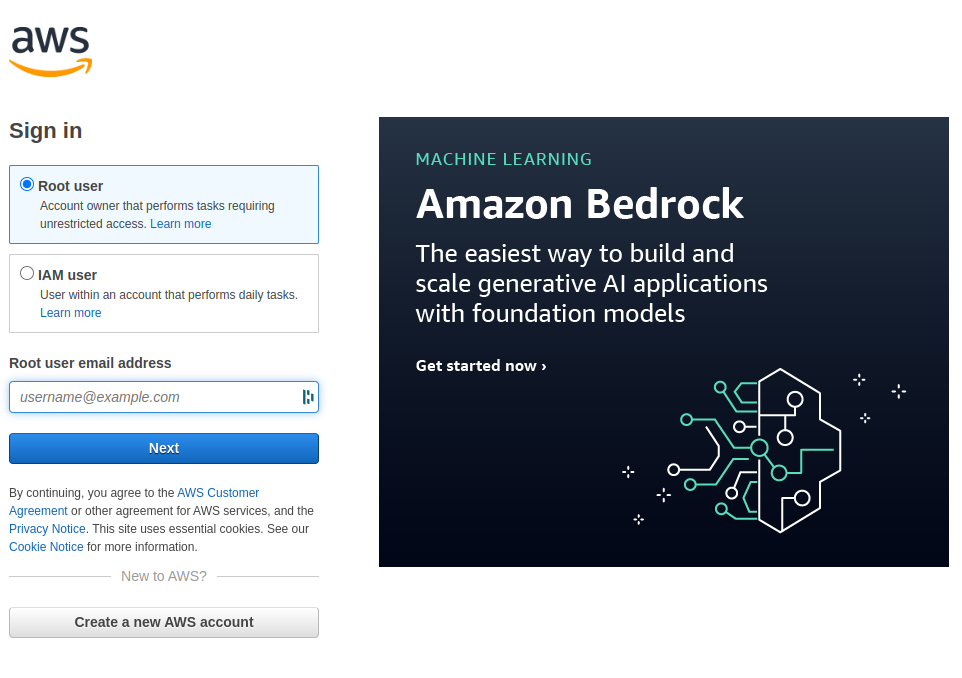
Note: The way you log in may be different if you use AWS Organizations
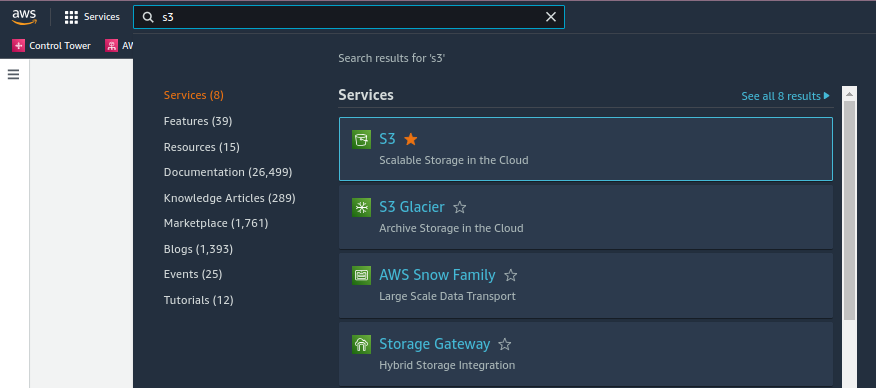
Step 2: Find S3
- Once logged in, you’ll see the AWS Management Console.
- In the search bar at the top, type “S3” and press Enter.
- Select “S3” from the search results.
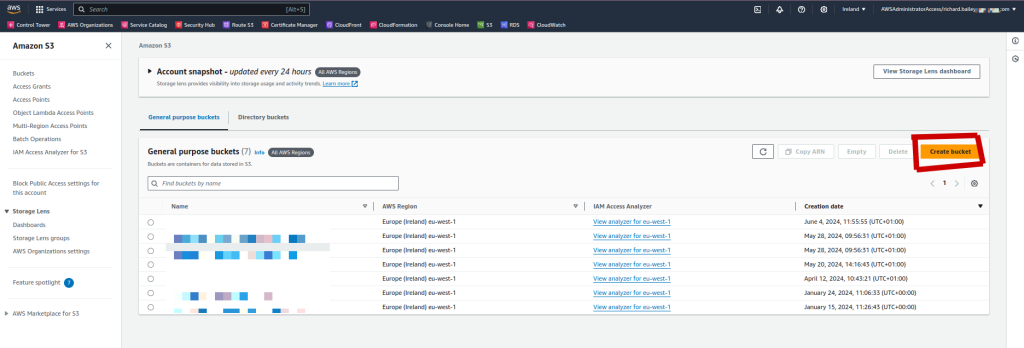
Step 3: Create S3 Bucket
- Click the “Create bucket” button.
Step 4: Name Your Bucket
- Enter a unique name for your bucket. Remember:
- It must be globally unique (no one else on AWS can have the same name).
- It can only contain lowercase letters, numbers, hyphens (-), and periods (.).
- It cannot start or end with a hyphen or period.
- It must be between 3 and 63 characters long.
- Consider using a naming scheme to help you organize your buckets (e.g.,
projectname-filetype-date).
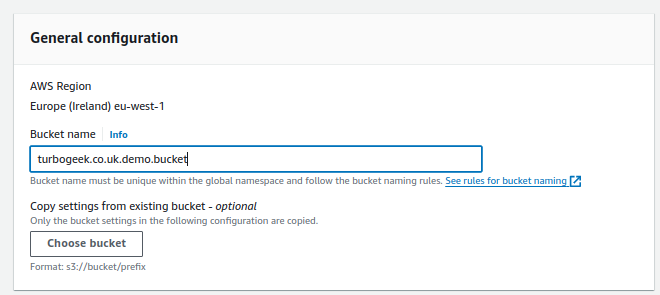
Step 5: Choose Region
- The S3 Bucket will be created in the region you are currently assigned to. If you want to change the region. Change it from the drop down menu (top right)

- Choose a region closest to your users for the best performance.
Step 6: Configure Options (Optional)
- Most of the time, you can leave the default settings. However:
- Block Public Access: Strongly consider enabling this unless you have a specific reason not to. It helps prevent accidental public exposure of your data.
- Object Ownership: For new buckets, the recommended setting is ACLs disabled and bucket owner enforced.
- You can always adjust these settings later if needed.
Step 7: Review and Create S3 Bucket
- Double-check all your settings to ensure they’re correct.
- Click “Create bucket.”

Your new S3 bucket is now ready to store objects!

Important Notes:
- Bucket Versioning: Consider enabling versioning to keep a history of your files. This allows you to recover previous versions if you accidentally delete or overwrite something.
- Lifecycle Rules: You can set up rules to automatically transition objects to different storage classes based on age or access patterns. This helps optimize costs.
- Security: Always review and configure the appropriate permissions to control who can access your buckets and objects.
Let me know if you’d like more details on any of these steps or aspects of S3.
How Do I Upload Objects to My S3 Bucket?
So you’ve got your bucket, how do I upload to my new bucket?
Step-by-Step Guide: Uploading Objects to Your S3 Bucket via AWS Console
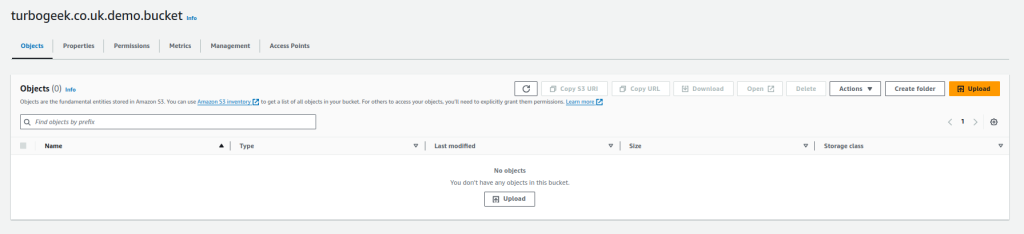
Step 1: Access Your Bucket
- Log into the AWS Management Console.
- Navigate to the S3 service.
- In the list of your S3 buckets, click the name of the bucket you want to upload to.
Step 2: Initiate the Upload
- Click the large “Upload” button near the top of the page.
Step 3: Add Your Files
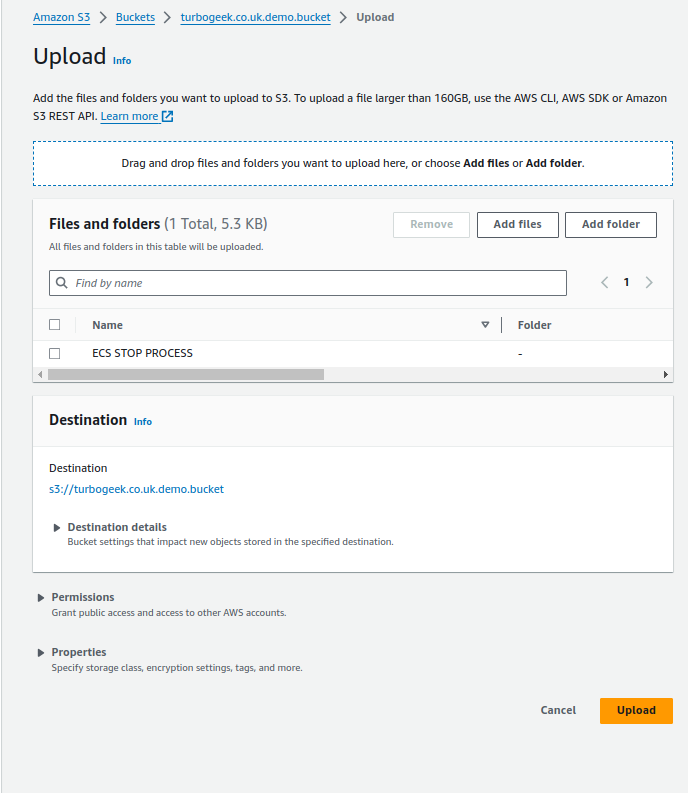
- You have two options:
- Drag and Drop: Directly drag files or folders from your computer into the designated area.
- Add Files: Click the “Add files” button to open a file browser and select the files you want to upload.
- Note: You can upload multiple files at once.
Step 4: (Optional) Configure Advanced Settings
- If you need to adjust any settings, click the “Properties” tab. Here, you can:
- Change Storage Class: Select a different storage class if needed (e.g., S3 Standard-IA for less frequent access).
- Set Server-Side Encryption: Choose encryption options to protect your data.
- Add Metadata: Include additional information about your files (e.g., tags for organization).
Step 5: Review and Set Permissions (Important!)
- Permissions: By default, uploaded objects are private. To make them public, click the “Permissions” tab and choose “Grant public read access to this object(s).” Use caution when making objects public, as anyone on the internet will be able to view them.
- Review: Double-check that you have the correct files selected and that the permissions are set as you intend.
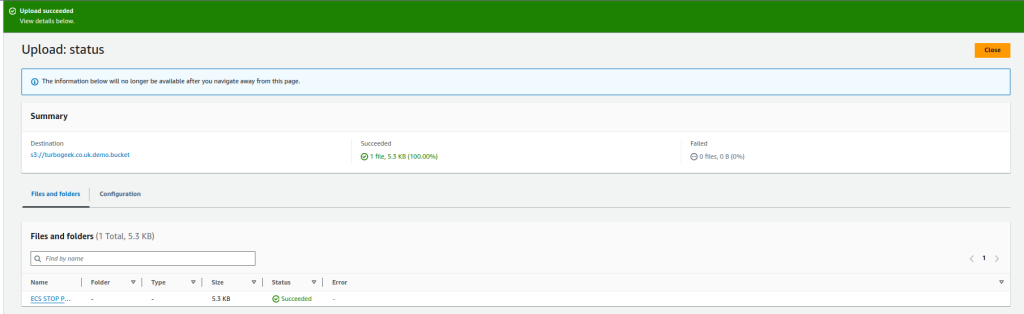
Step 6: Start the Upload
- Click the “Upload” button at the bottom of the page.
- The console will display the upload progress for each file.
Additional Tips:
- Folders: To organize objects, you can create folders (prefixes) within your bucket. When uploading, simply include the folder name in the object’s key (name).
- Large Files: For very large files, consider using multipart uploads for better performance and reliability. AWS provides tools and libraries to help with this.
Step-by-Step Guide: Uploading Objects to Your S3 Bucket via the AWS CLI
Step 1: Install and Configure AWS CLI
- Download:
- Visit the AWS CLI download page: https://aws.amazon.com/cli/
- Choose the installer for your operating system.
- Install:
- Follow the instructions provided by the installer.
- Windows: Run the installer.
- macOS: Install using Homebrew (
brew install awscli) or the installer package. - Linux: Use your distribution package manager or download the installer package.
- Verify Installation:
- Open a terminal or command prompt.
- Run
aws --version. You should see the AWS CLI version information.
- Configure:
- Run
aws configure. You’ll be prompted to enter:- AWS Access Key ID
- AWS Secret Access Key
- Default region name (e.g.,
us-west-2) - Default output format (e.g.,
json)
- Run
Step 2: IAM Permissions
- Create an IAM User (if needed): In the AWS Management Console, navigate to IAM (Identity and Access Management) and create a new IAM user.
- Attach Policy: Attach an IAM policy that grants the user permissions to access and manage S3 (e.g.,
AmazonS3FullAccessfor full access, or a custom policy with specific permissions). - Get Credentials: Note the Access Key ID and Secret Access Key for the user. You’ll need these for the CLI configuration.
Step 3: Basic AWS CLI S3 Commands
- List Buckets:
aws s3 ls - Create Bucket:
aws s3 mb s3://<your_bucket_name> - Upload File:
aws s3 cp <local_file_path> s3://<your_bucket_name>/<object_name> - Upload Directory (Recursive):
aws s3 cp <local_directory_path> s3://<your_bucket_name>/ --recursive - Download File:
aws s3 cp s3://<your_bucket_name>/<object_name> <local_file_path> - List Objects in a Bucket:
aws s3 ls s3://<your_bucket_name> - Delete Object:
aws s3 rm s3://<your_bucket_name>/<object_name> - Delete Bucket:
aws s3 rb s3://<your_bucket_name>(Ensure the bucket is empty!)
Example:
# Upload a file named "photo.jpg" to a bucket named "my-photos"
aws s3 cp photo.jpg s3://turbogeek.co.uk.demo.bucket/my-photos/

# Download a file named "document.txt" from the same bucket
aws s3 cp s3://turbogeek.co.uk.demo.bucket/my-photos/document.txt ./
Advanced Options:
- Public Access: Use the
--acl public-readoption with thecpcommand to make an object publicly accessible. (Use with caution!) - Storage Class: Use the
--storage-classoption to specify a different storage class when uploading (e.g.,aws s3 cp file.txt s3://my-bucket/ --storage-class STANDARD_IA).
Important Notes:
- Security: Always be mindful of your security settings and only grant the necessary permissions to users and applications.
- Error Handling: Be prepared to handle errors. If something goes wrong, the AWS CLI will provide error messages.
- AWS Documentation: Refer to the official AWS CLI documentation for a comprehensive list of commands and options: https://docs.aws.amazon.com/cli/latest/reference/s3/index.html
Q&A Create S3 Bucket on AWS
Q: What is an Amazon S3 bucket?
A: An S3 bucket is like a virtual container you create in the cloud using Amazon S3 (Simple Storage Service). You can use it to store any kind of digital data – documents, images, videos, backups, and even entire websites. Think of it like a highly scalable and durable folder in the cloud.
Q: Why should I use Amazon S3 to create S3 bucket?
A: Creating S3 buckets offers many benefits:
- Scalability: Store a few files or petabytes of data, S3 scales seamlessly with your needs.
- Durability: Your data is protected from hardware failures and is spread across multiple facilities for redundancy.
- Security: S3 provides robust security features to control who can access your data.
- Accessibility: Easily access your data from anywhere with an internet connection.
- Integration: S3 integrates seamlessly with other AWS services, making it ideal for building cloud applications.
- Cost-Effectiveness: Choose from various storage classes to optimize costs based on your access patterns.
Q: What can I store in an S3 bucket?
A: You can store virtually any type of file in an S3 bucket, including:
- Images (JPG, PNG, GIF)
- Videos (MP4, MOV)
- Documents (PDF, DOCX)
- Website files (HTML, CSS, JavaScript)
- Backups and archives
- Big data
- And much more!
Q: How do I create S3 bucket?
A: Follow these steps to create an S3 bucket:
- Log into the AWS Management Console.
- Navigate to the S3 service.
- Click the “Create bucket” button.
- Give your bucket a unique name (lowercase, numbers, hyphens only).
- Select a region close to your users for optimal performance.
- Configure optional settings like public access or encryption (see next question!).
- Click “Create bucket.”
Q: What are some important things to consider when I create S3 bucket?
A: Keep these factors in mind when you create S3 buckets:
- Security: By default, new buckets are private. Only grant public access if you specifically need it.
- Naming: Choose a clear, descriptive name that follows S3’s naming rules.
- Region: Pick a region that aligns with your data residency requirements and is closest to your users.
- Versioning: Enable versioning to keep historical copies of your files in case of accidental deletion or overwrites.
- Lifecycle: Configure lifecycle policies to automatically move objects to cheaper storage classes as they become less frequently accessed.
Q: Are there any costs associated with creating and using S3 buckets?
A: Yes, S3 is a paid service. Pricing depends on:
- Storage Class: Different storage classes have varying costs per GB per month.
- Data Transfer: You pay for data transferred out of S3 (e.g., when someone downloads a file from your website).
- Requests: You pay for requests made to S3 (e.g., GET, PUT).
Now you know how to use and create s3 bucket(s)!


Recent Comments