
Knowing how to Migrate DynamoDB tables between AWS accounts is an essential skill for an AWS Administrator. It’s a strategic move with significant benefits in various scenarios. Let’s delve deeper into why organizations choose to undertake this process
Quick Answer
- Export the source table using AWS DMS or Data Pipeline, or use the on-demand backup and restore feature in DynamoDB
- In the target account, create the destination table with the same key schema and attributes
- Use DynamoDB’s “Export to S3” in the source account, then “Import from S3” in the target account (supported natively since 2022)
- Verify item counts match:
aws dynamodb scan --table-name TABLE --select COUNT - Update your application connection strings to point to the new account’s table
Key Reasons to Cross-Account Migrate DynamoDB
Adopting a Multi-Account Strategy:
- Enhanced Security: Isolate workloads and data for different teams, projects, or environments. This minimizes the blast radius of potential security breaches and allows for granular access control.
- Improved Resource Management: Separate billing and resource quotas per account for better cost allocation and control.
- Streamlined Governance: Align account structures with organizational hierarchies or business units for clearer responsibility and compliance.
Cross-Account Backup Strategy:
- Disaster Recovery: Maintain backups in a separate account for added protection against accidental deletions, account compromises, or regional outages.
- Compliance: Adhere to data protection regulations that may require data to be stored in specific locations or under different ownership.
Sharing Data Between Accounts:
- Collaboration: Enable controlled access to DynamoDB tables for specific users or applications in other accounts, fostering secure data sharing and collaboration.
Business Needs and Compliance:
- Mergers and Acquisitions: Consolidate or reorganize data assets following business transactions.
- Regulatory Requirements: Comply with industry-specific regulations or data residency laws.
- Cost Optimization: Relocate tables to accounts with different pricing structures or reserved instances.
Options for DynamoDB Table Migration: A Toolkit for Success
Thankfully, AWS provides a range of robust tools and services to facilitate DynamoDB table migration:
- AWS Backup: A fully managed service for automated, point-in-time backups and cross-account restores.
- DynamoDB Import/Export using Amazon S3: Leverage S3 for data transfer, enabling manual or scripted migration processes.
- Amazon S3 and AWS Glue: Combine S3’s storage capabilities with Glue’s ETL (Extract, Transform, Load) capabilities for complex transformations during migration.
- Amazon EMR (Elastic MapReduce): Utilize a distributed computing framework for large-scale, parallel data processing and migration.
The choice of migration method depends on factors such as the table size, the desired level of automation, and the need for data transformation.
Option 1: Using AWS Backup for DynamoDB Migration
This method uses AWS Backup to create a backup in the source account, copy it to a backup vault in the destination account, and then restore it.
AWS Backup for Cross-Account Table DynamoDB Migration
- Use AWS Backup to create the backup at the source account
- Copy the backup from the source AWS account to the destination account
- restore the table in the destination account using the destinations AWS backup tool
- Both source and Destination Accounts must be in the same AWS Organization
Requirements:
- AWS Organizations
- Source and Destination Accounts must be in the same AWS Organization
- Customer Managed KMS keys shared across accounts

Step 1 – Enable These AWS Backup Features
Under the setting tab on the AWS BAckup console, ensure that the following items are enabled:
- Service Opt-In for DynamoDB
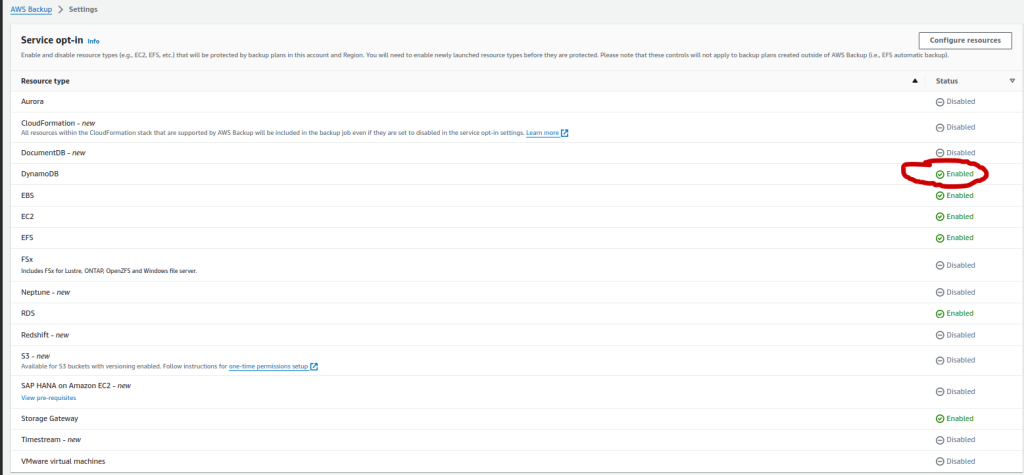
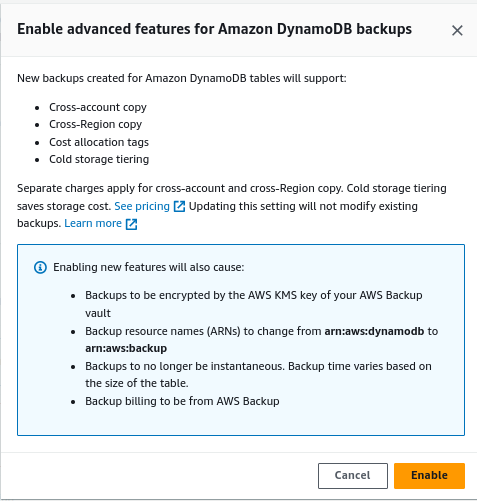
- Advanced Features for Amazon DynamoDB Backup
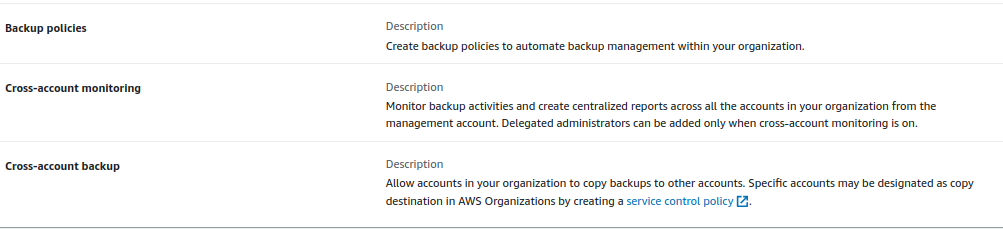
- Cross Account Management:
- Backup Policies
- Cross-Account Monitoring
- Cross-Account Backup
Step 2 – Configure the Destination Account
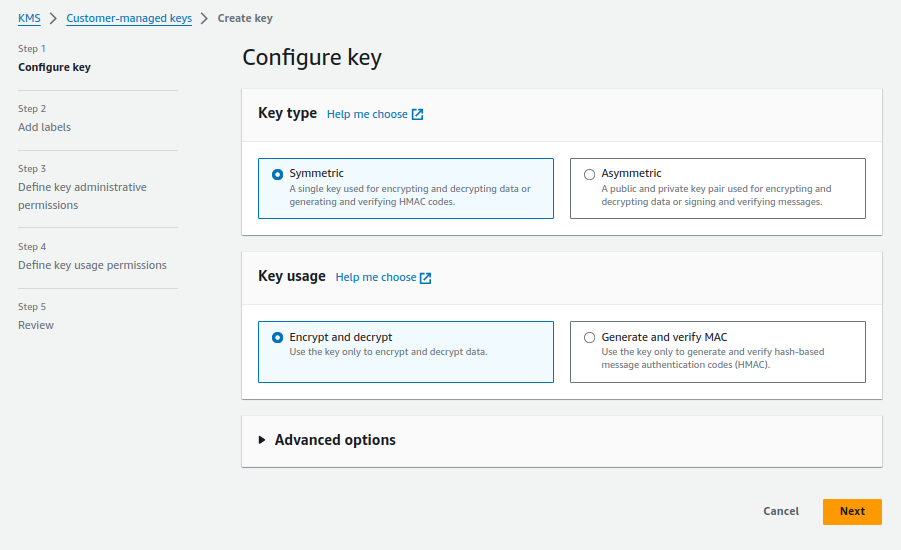
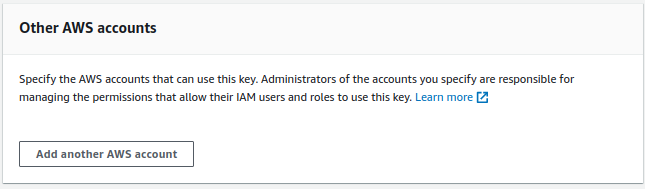
- Create Customer Managed KMS key and share it with the source account
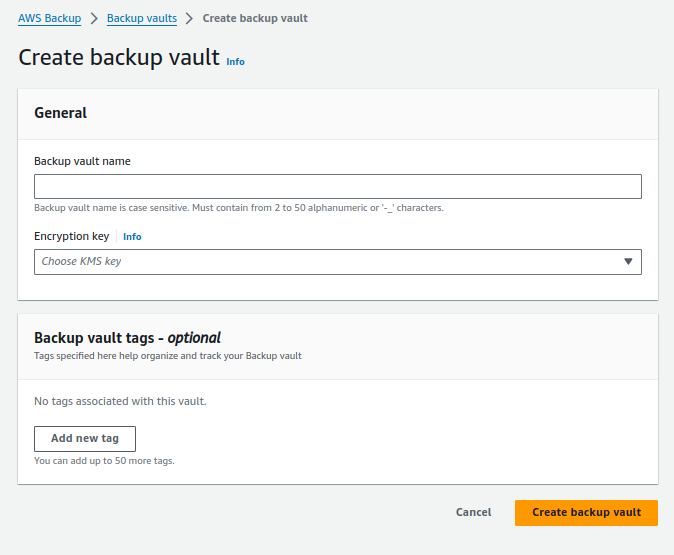
- Create an AWS Backup Vault using this KMS Key
- Allow access to the backup vault from the organization
Step 3 – Configure the Source Account
- Create a Customer Managed KMS Key and share it with the destination account
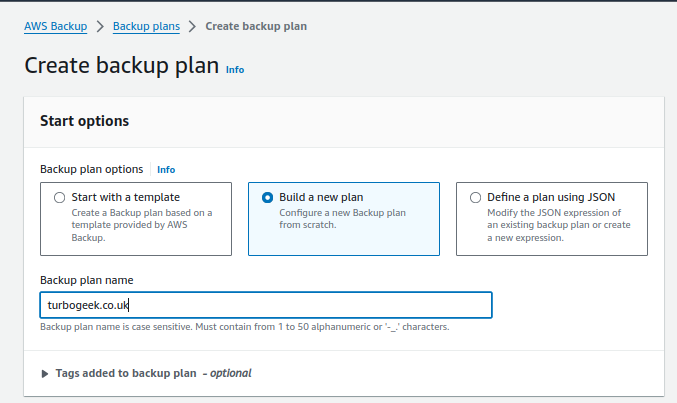
- Create an AWS Backup vault using the new key (Select “Build New Plan”)
- Allow access to the backup vault from your Organization
- Create a backup plan for DynamoDB tables
- Select the copy to another account vault option
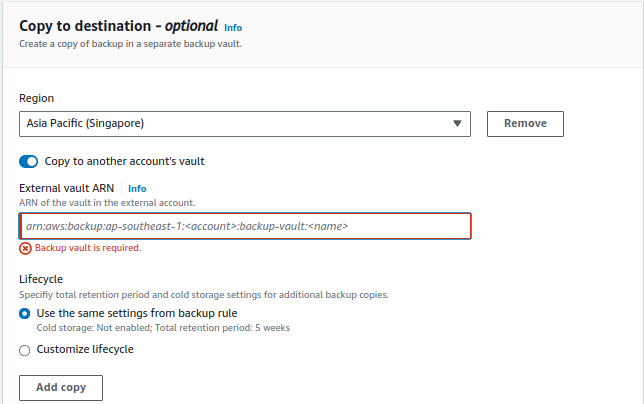
Now run the backup plan
Option 2: Using DynamoDB Export to S3 and Import from S3
You can use DynamoDB native “export to S3” feature to export data to the Amazon S3 destination account. Then use the native “import from S3” feature from the destination account.
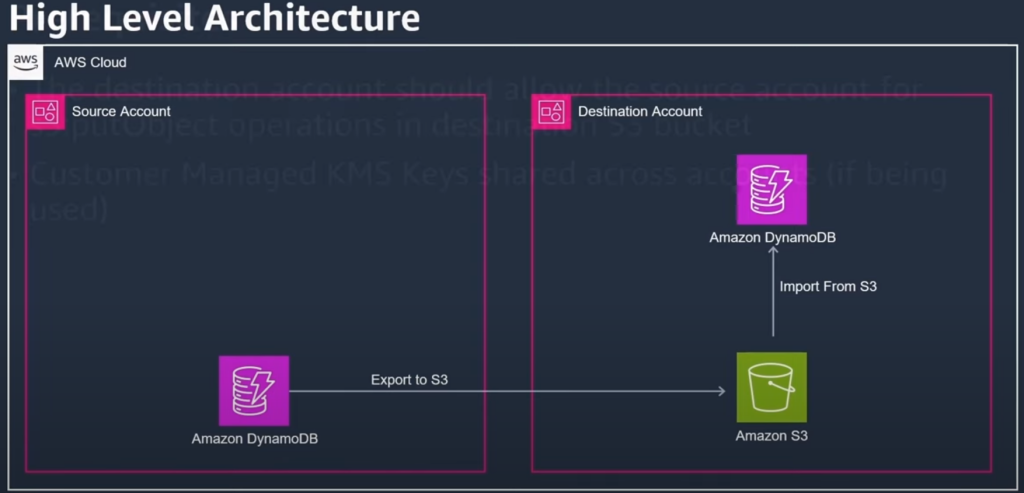
Requirements
- The destination account should allow the source account the s3:putObject role
- If using Customer Managed KMS Keys, these will need to be shared across accounts as well.
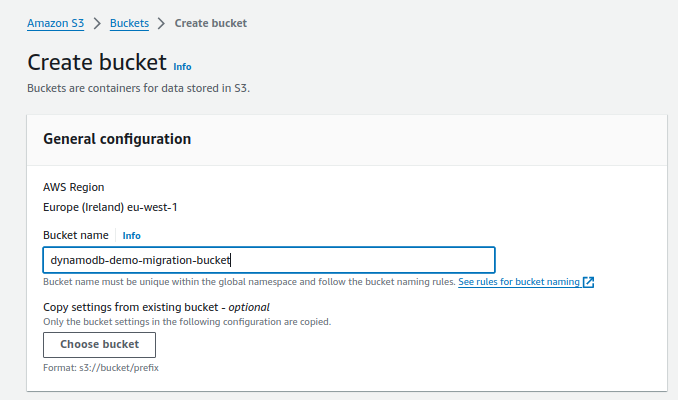
Step 1 – Create Destination S3 Bucket
- Simply create an S3 bucket in the destination account.
- Give your bucket a name
- Leave all the other settings as default

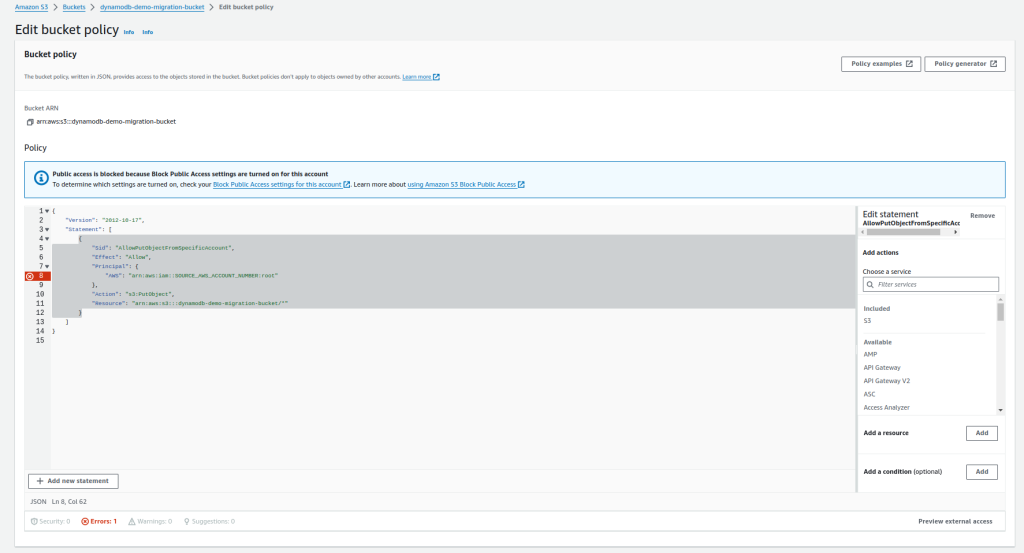
- Now set the bucket policy to allow objects to be added from the source account.
Here is an example JSON policy you can use. Make sure you update it with your information
{
	"Version": "2012-10-17",
	"Statement": [
		{
			"Sid": "AllowPutObjectFromSpecificAccount",
			"Effect": "Allow",
			"Principal": {
				"AWS": [
				    "arn:aws:iam::AWS_ACCOUNT1:root",
				    "arn:aws:iam::AWS_ACCOUNT2:root",
				    "arn:aws:iam::AWS_ACCOUNT3:root"
				    ]
			},
			"Action": "s3:PutObject",
			"Resource": "arn:aws:s3:::dynamodb-demo-migration-bucket/*"
		},
		{
			"Sid": "AllowSSLRequestsOnly",
			"Effect": "Deny",
			"Principal": "*",
			"Action": "s3:*",
			"Resource": [
				"arn:aws:s3:::dynamodb-demo-migration-bucket",
				"arn:aws:s3:::dynamodb-demo-migration-bucket/*"
			],
			"Condition": {
				"Bool": {
					"aws:SecureTransport": "false"
				}
			}
		}
	]
}

Step 2 – Setup Source Account to Export Data
Log into the source account, navigate to DynamoDB > Tables > “YOUR TABLE” and click the backups TAB
- Enable “Point-in-time-restore” for DynamoDB Tables.

Important: If you are using a Customer-Managed AWS Key, you must share the key from the source account to the target account.
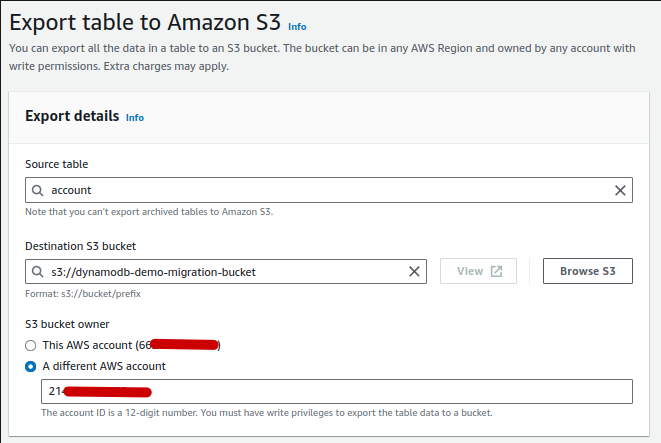
- Configure Export to S3 to the Destination Account
- Click DynamoDB > Exports to S3 > Export to S3
- Provide the following information
- Source Table
- Destination S3 Bucket
- Select Either “This AWS Account” or “A Different AWS Account” depending on your needs.
- Set the Export Settings as follows:

You can monitor the progress of the export on the next page:

Note: Depending on the size of your tables, the export to S3 can take a long time.

Step 3 – Import from S3
The next step is to go to the destination account and import the data from S3. Simply navigate to DynamoDB in the destination account and use the Import from S3 feature
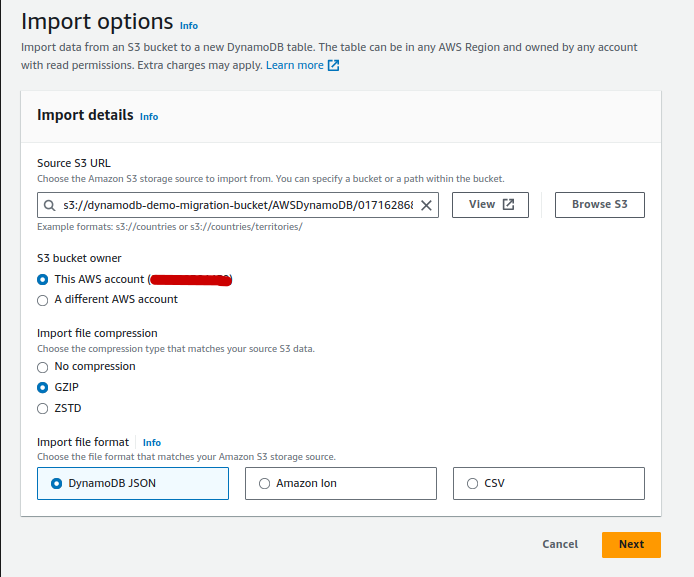
- Import the table:
- Choose the source URL by pointing to the DATA folder in your S3 bucket
- Pick the S3 Bucket owner (it should be “This Account”)
- Pick the compression, mine was compressed in GZIP. You can discover your data type by browsing the S3 bucket.
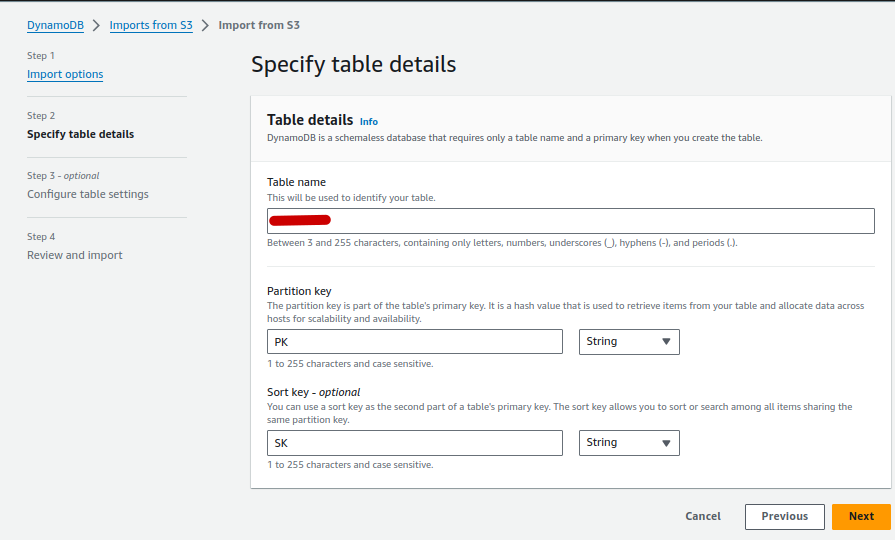
- Click Next and on the “Specify Table Details” page:
- Give your table a name. I will be using the original table name.
- If you use a Partition and Sort Key – Enter those here. If not, leave blank.
- VERY IMPORTANT: Provide the Partition Key and Sort Key of your DynamoDB. The easiest way to find this is to use the AWS-CLI. If you don’t do this the import will fail.
aws dynamodb describe-table --table-name <table-name>The output will contain a “KeySchema” section, which lists the attributes and their key types (HASH for partition key, RANGE for sort key).
For Example:
        "KeySchema": [
            {
                "AttributeName": "PK",
                "KeyType": "HASH"
            },
            {
                "AttributeName": "SK",
                "KeyType": "RANGE"
            }
        ],
In my example, the primary key is PK and the Sort Key is SK
- Complete the rest of the details and import. I am using a customer KMS key, so I have opted for the customized option so I can provide my KMS details.
- After the “Review and Import” page, Click Import and Wait a short while until completed.

- Monitor until completion

Step 4 – Troubleshooting
- If you hit any errors during the import, Cloudwatch will log all the problems.
Example Error:

- CloudWatch > Log groups > /aws-dynamodb/imports

This is the type of output you receive in the Cloudwatch logs. If you Google the “error message,” you will see official AWS answers on how to fix it. In the example below, the problem was that I hadn’t chosen the “data” folder, and I hadn’t selected the compression type, I’m my case it was GZIP.
{
    "itemS3Pointer": {
        "bucket": "dynamodb-demo-migration-bucket",
        "key": "AWSDynamoDB/01716286804939-ee175b9c/data/brx5b427pa5yxocces3jihsthq.json.gz"
    },
    "importArn": "arn:aws:dynamodb:eu-west-1:MYACCOUNT1:table/XXXXXX/import/01716288035060-78c15a07",
    "errorMessages": [
        "Unexpected token. Remainder of the file will not be processed."
    ]
}

{
    "itemS3Pointer": {
        "bucket": "dynamodb-demo-migration-bucket",
        "key": "AWSDynamoDB/01716286804939-ee175b9c/manifest-summary.json"
    },
    "importArn": "arn:aws:dynamodb:eu-west-1:MYACCOUNT1:table/XXXXXX/import/01716288035060-78c15a07",
    "errorMessages": [
        "Expected 'Item' top level container. Remainder of the file will not be processed."
    ]
}That’s it for now. I am still working on the Amazon S3 with AWS Glue and the Amazon EMR way to migrate DynamoDB.
In the meantime, check our Tech Quickys
Thanks for taking the time to read this article. if you have any questions or feedback, please write in the comment section below.
Leave a Reply