How to Install TypeScript on Linux (A Step-by-Step Guide)
Key Takeaways
- Prerequisite: TypeScript installation on Linux requires Node.js and its package manager, npm, to be installed first.
- Core Command: The primary command to install TypeScript globally on your system is
$ npm install -g typescript. - Verification: After installation, you can confirm it was successful by running the command
$ tsc -v, which displays the installed compiler version. - Next Steps: Once installed, you can start writing code in
.tsfiles and compile them into standard JavaScript using thetsccommand (e.g.,$ tsc yourfile.ts).

What is TypeScript?
TypeScript is a powerful, open-source programming language developed and maintained by Microsoft. It acts as a strict syntactical superset of JavaScript, meaning any valid JavaScript code is also valid TypeScript code. Its main advantage is adding optional static typing, which helps developers catch errors early in the development process, long before the code is run. For anyone looking to build robust, scalable applications, understanding what is TypeScript is a crucial first step.
Why Do I Need Node.js to Install TypeScript?
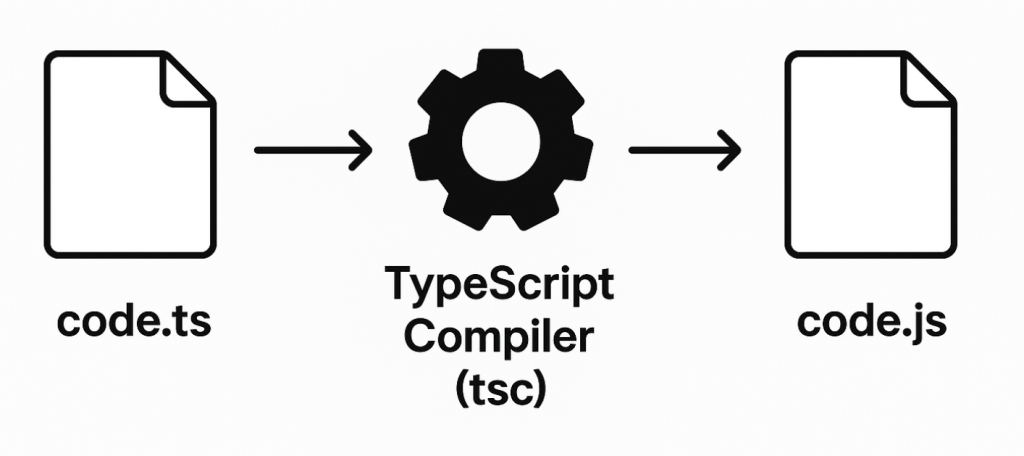
You need Node.js because the TypeScript compiler, the tool that converts your TypeScript code (.ts) into browser-readable JavaScript (.js), is distributed as a package through the Node Package Manager (npm). npm is bundled with every installation of Node.js. Therefore, installing Node.js is the essential first step to getting npm, which in turn allows you to install TypeScript.
Step 1: Install Node.js
- Open Terminal: Launch your Linux distribution’s Terminal.
- Update Package Lists (if needed): For Debian-based systems (like Ubuntu), run: Bash
sudo apt updateFor Red Hat-based systems (like Fedora), run: Bashsudo dnf upgrade - Install Node.js:
Debian-based:
sudo apt install nodejsRed Hat-based:
sudo dnf install nodejs- Other Distributions: Use your distribution’s package manager (e.g.,
pacmanfor Arch Linux,zypperfor openSUSE) to install thenodejspackage. - Verify Node.js Installation:
- In Terminal, type
node -vand press Enter. This should display the installed Node.js version.
- In Terminal, type
Step 2: Install TypeScript
- Open Terminal: If you close it, open a new Terminal window.
- Install TypeScript Globally: Run the following command:
npm install -g typescript - The
-gflag installs TypeScript globally, making it accessible from any location on your system. - Verify TypeScript Installation:
- In Terminal, type
tsc -v- and press Enter to display the installed TypeScript version.
Step 3: (Optional) Update TypeScript
To update to a newer version of TypeScript in the future, run:
npm update -g typescript
That’s it! You have successfully installed TypeScript on your Linux machine. You are now ready to start developing with TypeScript!


Recent Comments