
How to install Microsoft SQL 2012 R2
Long before the widespread adoption of managed cloud database services, technical engineers commonly built and deployed databases directly onto operating systems. Installing Microsoft SQL Server on Windows Server was a frequent task.
Microsoft SQL Server 2012 R2 (SQL-2012), released in April 2012, is a robust relational database management system. While still a powerful tool for managing data, it’s important to be aware that it is an older version. Newer versions like SQL Server 2019 and 2022 offer enhanced features, performance, and security improvements. This guide focuses on installing SQL Server 2012 R2, but consider exploring these newer versions depending on your needs and compatibility requirements.
Here is a quick guide on installing SQL-2012 onto a Windows Server 2012 R2 platform.
Pre-Requisites

Check the system requirements:
Before starting, confirm your server meets the minimum hardware (RAM, CPU, Disk Space) and software (Operating System version, .NET Framework) requirements for SQL Server 2012 R2. Consult the official Microsoft documentation for specifics. Ensure .NET Framework 3.5 SP1 is enabled on the server, as the installer often requires it. You can typically enable this via Server Manager -> Add Roles and Features.
You can find the criteria on Microsoft’s website.
Download the SQL Server installer:
Ensure you have access to the SQL Server 2012 R2 installation files. This might be:
- Downloads from sources like Volume Licensing Service Center (VLSC) or Visual Studio Subscriptions (formerly MSDN).
- Physical media (DVD)
- An ISO image file (mount it on the server)
- A network share location

Administrator Privileges: You will need local administrator privileges on the server to perform the installation.
Dedicated Server Recommended: For optimal performance and security, it’s highly recommended to install SQL Server on a dedicated server, not one running other demanding applications (like Active Directory Domain Controllers, Exchange, etc.).
Step 1 – Insert SQL-2012 Media into the server.
Before beginning the installation of SQL Server 2012, ensure you have the SQL Server installation media ready. Follow these detailed steps to insert the media into the server:
- Access the Installation Media
Make sure you can access the SQL Server 2012 R2 installation files. This could be through:
- Physical media (DVD): Insert the DVD into your server’s drive.
- Virtual media (ISO): Mount the ISO file on your server.
- Network location: If the installation files are on a network share, ensure your server has access.
- Using Remote Connections:
- If the SQL-2012 media is located on a remote server, establish a secure connection to that server. This could involve using Remote Desktop Protocol (RDP) or other remote access tools.
- If the SQL-2012 media is located on a remote server, establish a secure connection to that server. This could involve using Remote Desktop Protocol (RDP) or other remote access tools.
- Verify Accessibility:
- Before proceeding, double-check that the server can access the SQL-2012 media. This is crucial to ensure a seamless installation process.
- Before proceeding, double-check that the server can access the SQL-2012 media. This is crucial to ensure a seamless installation process.
- Exploring Additional Options:
- Depending on your server setup, consider exploring advanced options, such as:
- Local Copies: If you have a local copy of the SQL Server installation media on the server’s hard drive, ensure it is accessible.
- Network Shares: If the SQL-2012 media is on a network share, ensure the server has the necessary permissions to access it.
- Depending on your server setup, consider exploring advanced options, such as:
- Preparing for Installation:
- Once the SQL-2012 media is successfully accessible by the server, you are ready to proceed with the installation. Follow the subsequent steps in your procedure to initiate the SQL Server installation.

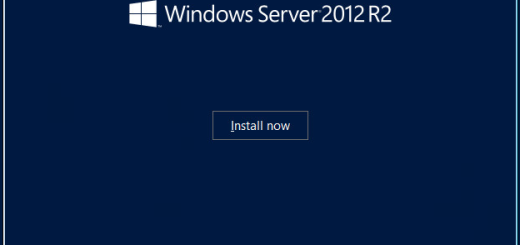
Example of the Setup splash screen
Step 2 – Run the Setup on the media
- Run Setup from DVD.
- Run the installer: Double-click the SQL Server installer to launch the installation wizard.
After successfully inserting the SQL Server 2012 media into the server, follow these steps to initiate the installation process:
- Navigate to the Installation Media:
- Open File Explorer and browse to the location where the SQL Server 2012 media is accessible. This could be the DVD drive, a mounted virtual drive, or a network location.
- Open File Explorer and browse to the location where the SQL Server 2012 media is accessible. This could be the DVD drive, a mounted virtual drive, or a network location.
- Locate the Setup Executable:
- Look for the setup executable file within the media directory. This file is typically named “setup.exe” or “setup.bat.”
- Look for the setup executable file within the media directory. This file is typically named “setup.exe” or “setup.bat.”
- Run the Installer:
- Double-click the SQL Server installer executable to launch the installation wizard. If you encounter User Account Control (UAC) prompts, confirm the action to proceed with administrative privileges.
- Double-click the SQL Server installer executable to launch the installation wizard. If you encounter User Account Control (UAC) prompts, confirm the action to proceed with administrative privileges.
- Initialization Process:
- The installer will initiate an initialization process, loading necessary files and components. This may take a few moments, depending on the server’s processing speed.
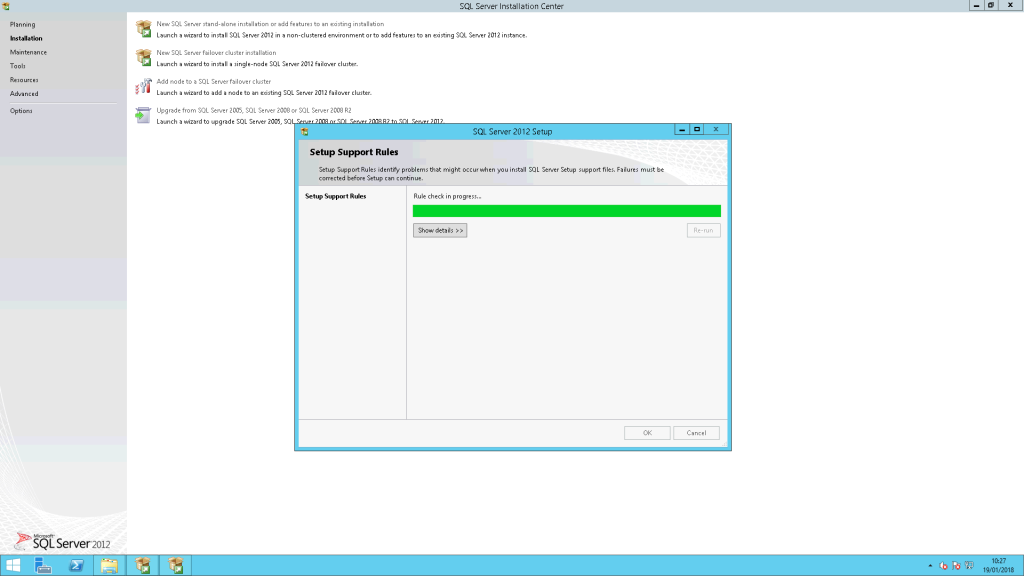
Step 3 – Check Require Windows Roles are Installed
The server will ensure you have installed all the required roles before installing. You will be prompted here and asked to install additional software, such as Visual Basic, if there are any issues.
Commonly Needed Windows Features:
- .NET Framework 3.5 (or later): This is usually required for SQL Server setup and some of its components.
- Windows PowerShell: If you plan to use SQL Server PowerShell modules for administration tasks.
- Web Server (IIS) role: Only necessary if you intend to install and use SQL Server Reporting Services (SSRS) in certain configurations.
How to Check and Install Windows Features:
- Open Server Manager.
- Go to Manage -> Add Roles and Features.
- Follow the wizard, ensuring you select the features mentioned above (and any others specific to your SQL Server configuration) during the installation process.
Additional Considerations:
- Some specific SQL Server features might have additional requirements. Refer to the SQL Server documentation for detailed information about the dependencies of the components you plan to install.
- It is always recommended to install SQL Server on a server that is dedicated to running the database engine for optimal performance and security.
Step 4 – Continue Configuring the Installer
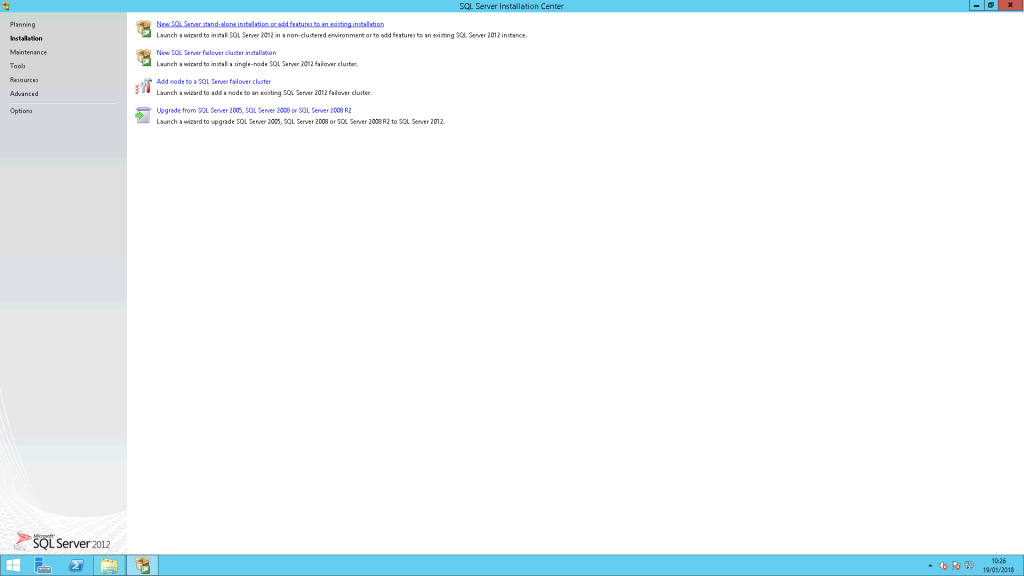
- Welcome: Briefly review the information on the welcome screen.
- Installation Type:
- New Installation: Choose this if you’re installing SQL Server for the first time on this machine.
- Add Features: Select this if SQL Server is already present, and you want to enhance its capabilities.
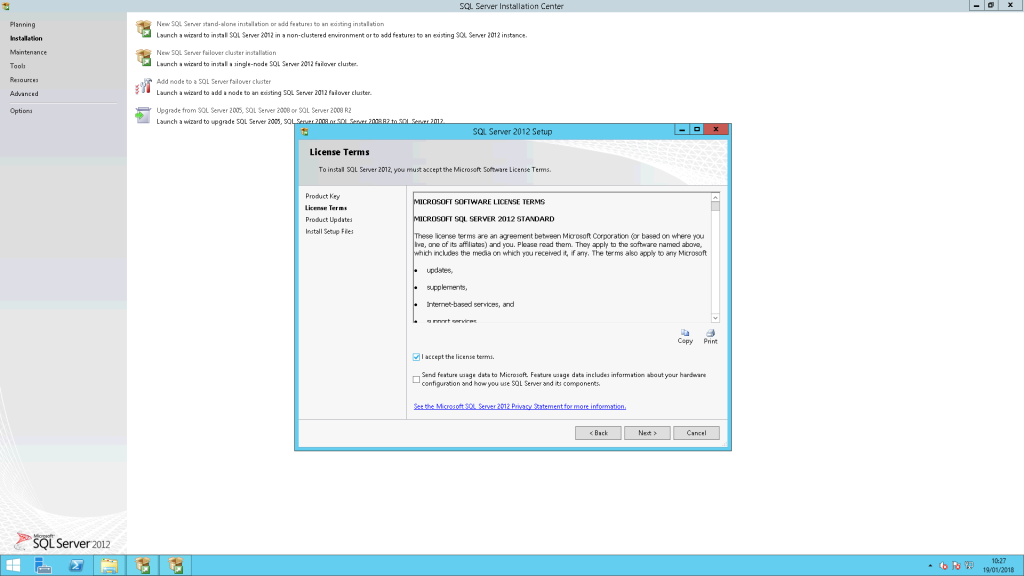
- License Agreement: Carefully read the terms, and check the box to accept them before proceeding.
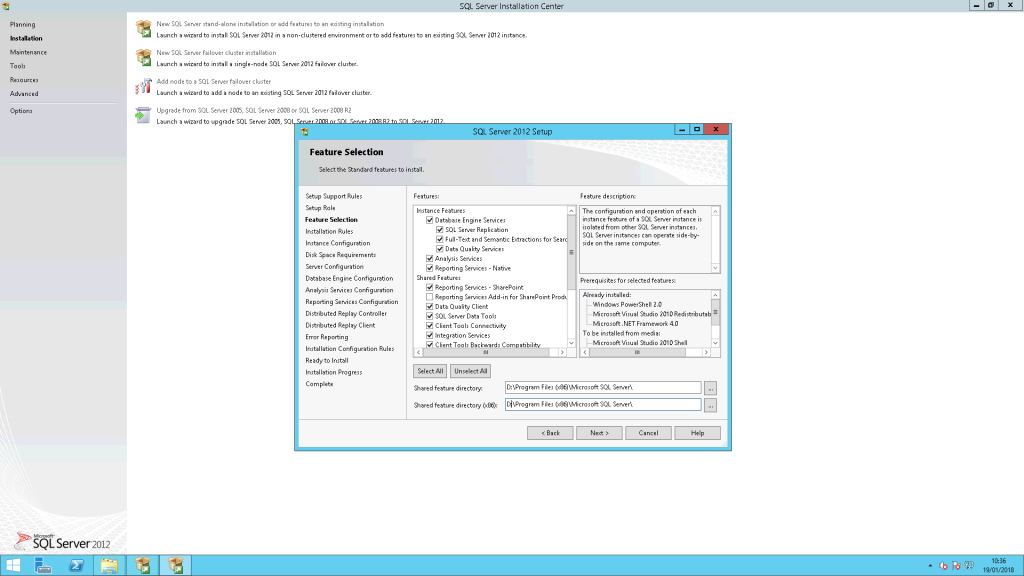
- Feature Selection (Crucial):
This is a crucial step! Carefully choose the features you need. Here are some key options:
- Carefully consider which features your database tasks require.
- Core Options:
- Database Engine Services: Essential for storing and managing data.
- SQL Server Replication: Enables copying data between databases.
- Additional Options (Select as needed):
- Full-Text and Semantic Extractions: Advanced search capabilities.
- … (Other features listed by the installer): Explore descriptions to determine their relevance to your work.
(The installer will list other features. Refer to SQL Server documentation if you’re unsure what a feature does.)
Accept the Licence, then Select the installation type:
Choose the one that best suits your needs. For example, you can install the database engine, SQL Server Management Studio, or Reporting Services.
Step 5 – Instance & Server Configuration
Ensure Shared Feature Directories are pointing to the D:\ Drive.
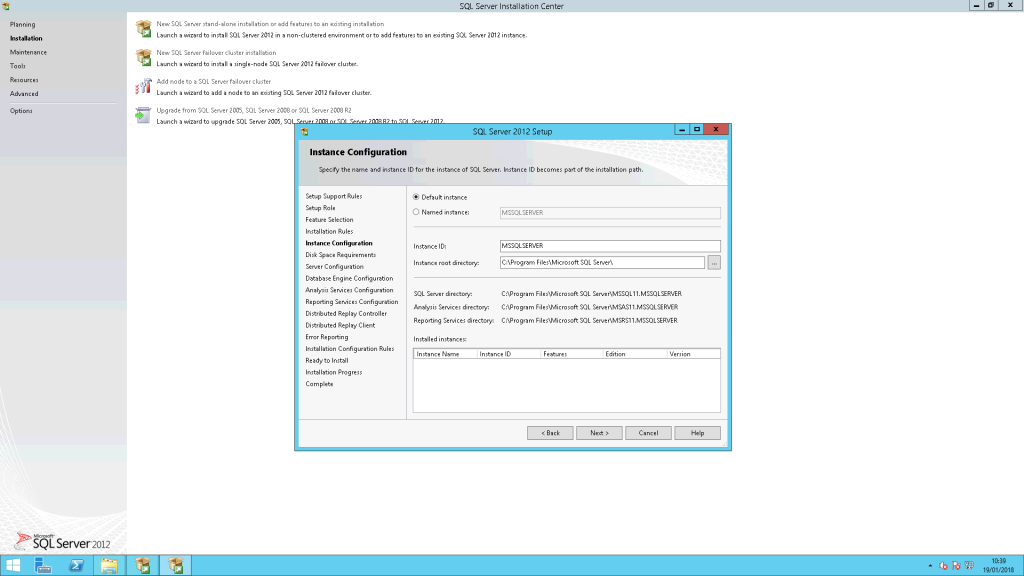
Instance Configuration:
Specify the SQL Server instance name and choose the instance features. You can opt for a default instance or provide a unique name for a named instance.
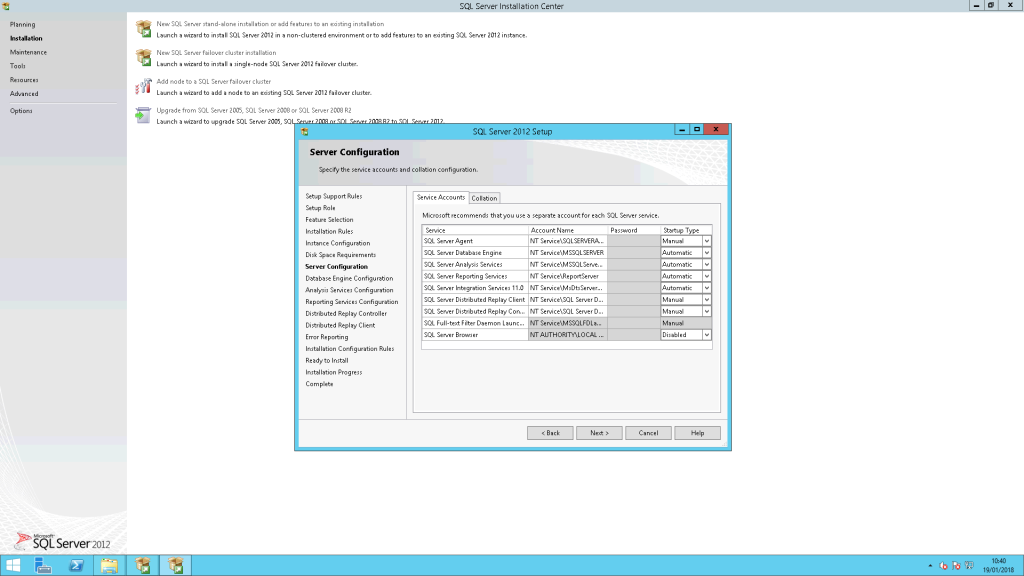
Server Configuration:
Configure server authentication mode (Windows or Mixed Mode) and set the necessary SQL Server administrator accounts and passwords.
Step 6 – Database Engine Configuration
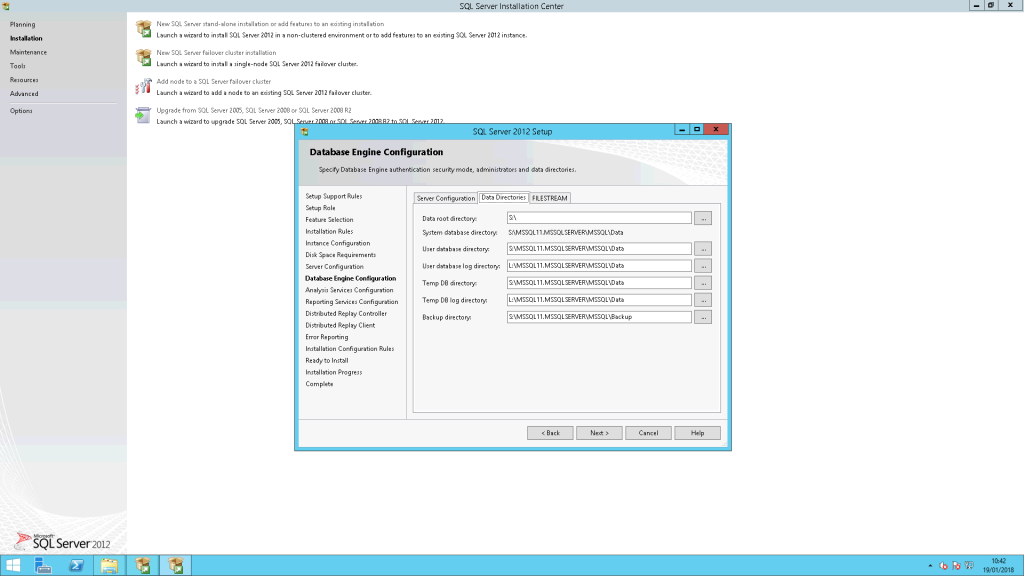
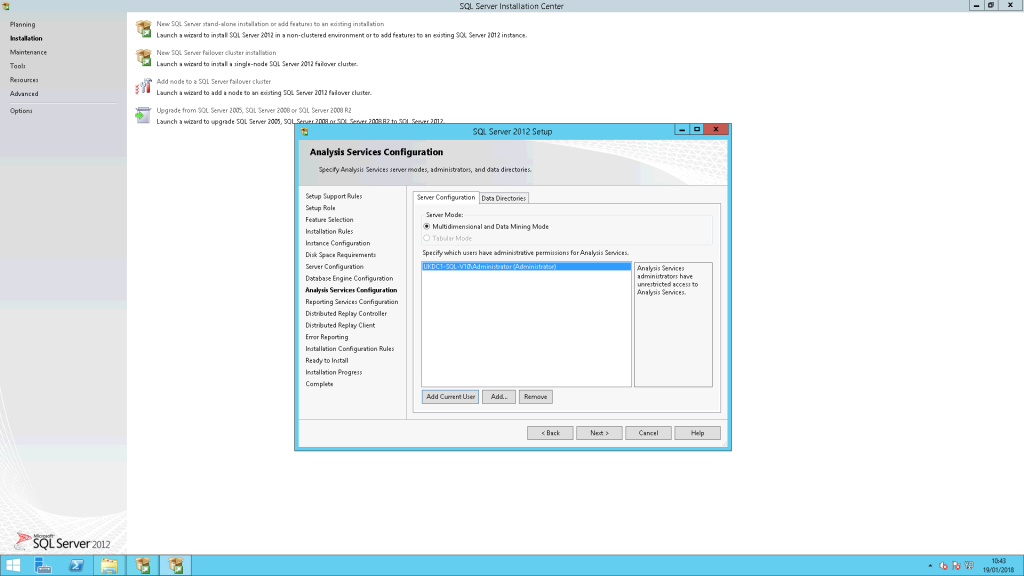
Database Engine Configuration:
Customize settings for the Database Engine, including authentication mode, administrators, and data directories.
- Under the Data Directories tab, ensure you choose:
- S:\ for Database files
- L:\ for Logs
- On the Analysis Services configuration, add the Current User – (This can be changed later in SQL Server Management Studio)
- Under Reporting Services Configuration, select “install, but do not configure the report server.” – (This can be changed later in SQL Server Management Studio)
- On the next screen, Distributed Replay Controller, ensure set as below and click next.
- On the next screen, Distributed Replay Client, ensure it is set as below and click next.
- On the next screen, Error Reporting, ensure the tick box is blank and click next.
- Click Next to bring up the final screen, “Ready to install,” and choose INSTALL.
- The installation will take about 30 minutes to complete.
- Once completed, open SQL Server Management Studio and log in with the Mixed Mode SA account you created earlier.
- Log in with the SA account or Administrator.
- Expand the column on the left; if you have a green “play” button, SQL is running.
Ready to Install:
Review the summary of your selected configurations on the “Ready to Install” screen. Click “Install” to commence the installation process.
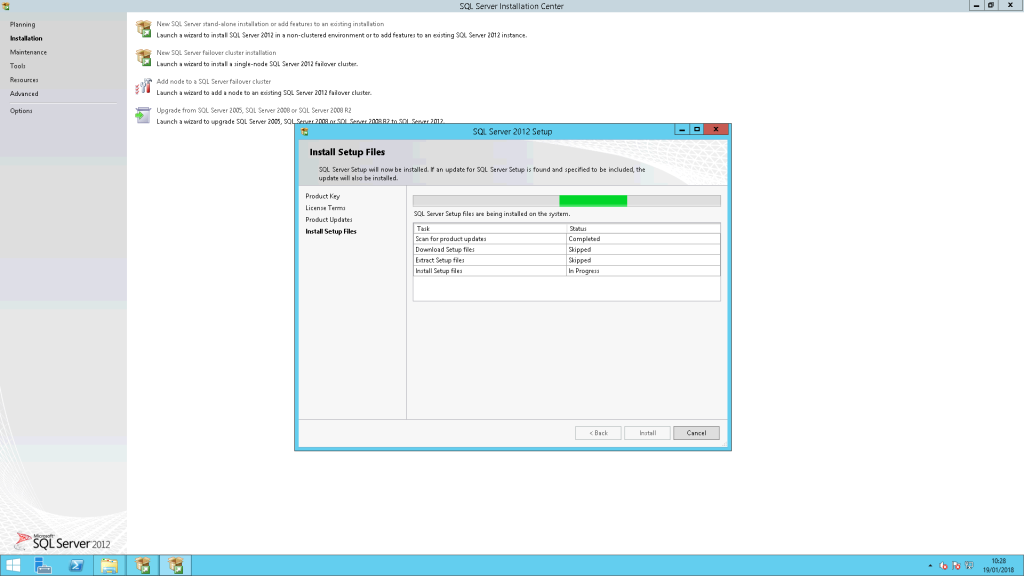
Installation Progress:
The installer will now execute the installation based on your chosen configurations. A progress bar will indicate the completion status.
Completion Screen:
Once the installation is successful, a completion screen will provide details. You can also review summary logs to ensure a smooth installation process.
Crucial Post-Installation Steps
Installing the base product is just the first step. The following are essential:
- Create Maintenance Plans: Set up regular maintenance tasks like index reorganization/rebuilding and statistics updates.
- Apply Updates: Immediately check for and install the latest available Service Pack (SP) and Cumulative Updates (CUs) for SQL Server 2012 R2. This is critical for security patches and bug fixes. Note: SQL Server 2012 R2 is out of mainstream support; Extended Security Updates (ESU) might be required for ongoing patches, which typically require purchase.
- Verify Connectivity: Open SQL Server Management Studio (SSMS). Connect to the newly installed instance using Windows Authentication (with the admin account you added) or the
saaccount (if Mixed Mode was enabled). Check that the instance is running (green play icon next to the server name in Object Explorer). - Configure Memory: Use SSMS (Server Properties -> Memory) to set the Maximum Server Memory (MB). Do not leave it at the default (unlimited). Reserve sufficient memory for the Operating System (typically 4GB or 10%, whichever is larger). Set the maximum to prevent SQL Server from consuming all server memory.
- Configure
tempdb: Optimizetempdbby configuring multiple data files (typically one file per CPU core, up to 8 files), ensuring they are equally sized and placed on fast storage. - Check Network Configuration: Open SQL Server Configuration Manager. Ensure necessary network protocols (like TCP/IP) are enabled under “SQL Server Network Configuration” -> “Protocols for [YourInstanceName]”. Verify the correct TCP port (default is 1433 for the default instance).
- Configure Firewall: Ensure the Windows Firewall (or any network firewall) allows incoming connections on the SQL Server TCP port (e.g., 1433) from required client machines/servers. Also, allow port 1434/UDP for the SQL Server Browser service if using named instances.
- Establish Backup Strategy: Immediately configure regular database backups (Full, Differential, Transaction Log) using SQL Server Agent Jobs and Maintenance Plans.

Recent Comments