
How to Install & Configure Proxmox Virtualization Hypervisor
Proxmox is a free, open-source virtualization hypervisor that offers many features, including enterprise-grade capabilities similar to VMware vSphere and Red Hat OpenStack. Proxmox is based on Debian and can be installed either as a hypervisor on bare metal or on top of an existing Debian installation. This procedure will do the latter and install on top of Debian.
A lot of people are jumping ship from Broadcomm VMware because ESXi is no longer free. Proxmox is the perfect choice if you are wanting a change from VMware.
To follow along, you will need a server installation of Debian. I will be using Debian 11 x64.
Enhanced Guide: Installing Proxmox VE on Debian
Important Notes:
- Backup: Always back up your system before making significant changes. Proxmox installation alters Debian system files and configuration files.
- Networking: Ensure your server has a static IP address and working network connectivity for smooth installation.
- No-Subscription Repo: This guide uses the “no-subscription” Proxmox repository, suitable for testing and non-production environments.
Step 1 – Update and Upgrade Debian
Updating the OS is standard practice before installing any major software application. It refreshes the local list of available packages (apt update) and then upgrades any outdated packages to their latest versions (apt upgrade). This ensures you’re working with the most up-to-date and secure system environment.
apt update -y
apt upgrade -y
(You may require a reboot. It depends on how out of date the OS is)
Step 2 – Add the Proxmox Repo
Now, we must add a new software source to the system configuration. The source is the Proxmox repository, which contains the necessary packages for Proxmox VE. The bullseye portion indicates the Debian version (Bullseye is equivalent to Debian 11).
echo "deb [arch=amd64] http://download.proxmox.com/debian/pve bullseye pve-no-subscription" > /etc/apt/sources.list.d/pve-install-repo.listStep 3 – Download Proxmox
Now download the GPG (GNU Privacy Guard) key for the Proxmox repository. GPG keys are used to verify the authenticity of software packages, ensuring they haven’t been tampered with.
wget https://enterprise.proxmox.com/debian/proxmox-release-bullseye.gpg -O /etc/apt/trusted.gpg.d/proxmox-release-bullseye.gpgStep 4 – Upgrade and Install Proxmox Kernel
Another update is run to include the newly added Proxmox repository. Then, the apt full-upgrade ensures all packages, including any that were just updated, are upgraded to their latest versions. The pve-kernel-5.15 (replace with the actual version) package is the Proxmox-specific kernel, essential for running Proxmox VE. A reboot is necessary to switch to this new kernel.
apt update && apt full-upgrade
apt install pve-kernel-5.15 -y
Now Reboot
rebootStep 5 – Install Proxmox and Dependencies
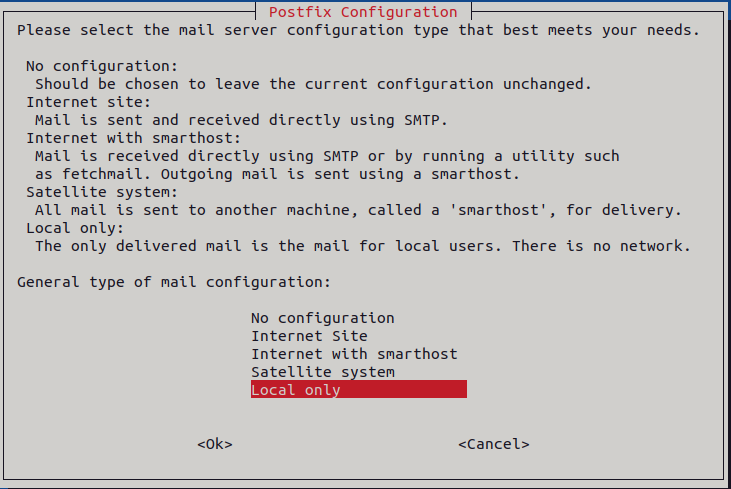
Now install the core Proxmox VE software (proxmox-ve), the Postfix mail transfer agent (used for system notifications), and Open-iSCSI (for storage connectivity)
You’ll be prompted to configure Postfix during this process.
apt install proxmox-ve postfix open-iscsi -yYou will be prompted to configure Postfix. For demo purposes, I have configured as follows:

Step 6 – Housekeeping
To prevent conflicts between the Debian Kernel and the Proxmox Kernel, it important to clear down the Debian Kernel as follows.
apt remove linux-image-amd64 'linux-image-5.10*'

update-grub

apt remove os-prober
This step is optional but highly recommended. It removes the standard Debian kernel and related packages. Helping to avoid conflicts with the Proxmox kernel. update-grub updates the bootloader configuration to reflect the changes. Removing os-prober prevents the system from scanning for other operating systems during boot.
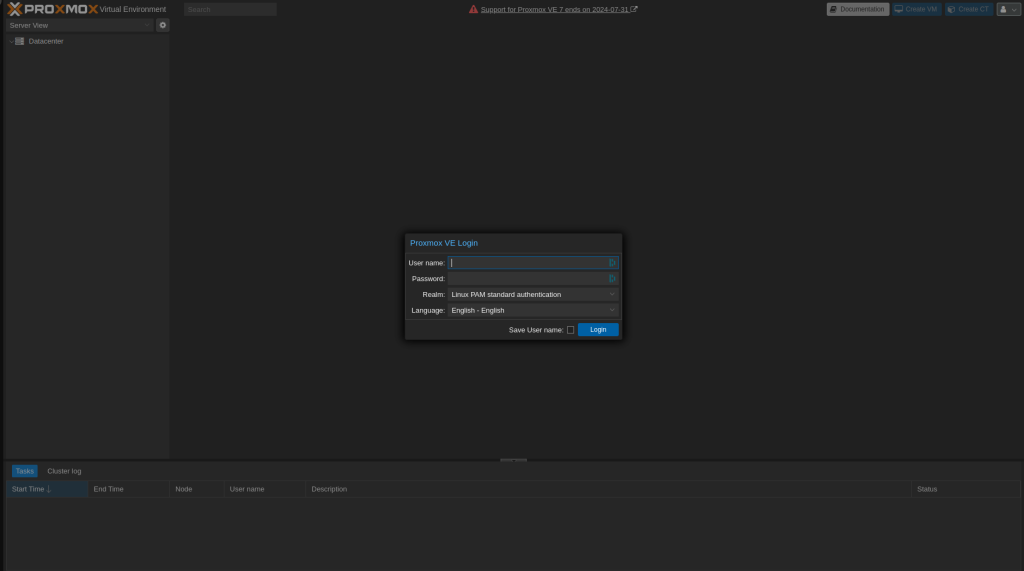
Step 7 – Access Proxmox GUI
Once the installation and configuration are complete, you can access the Proxmox web interface by navigating to your server’s IP address followed by port 8006 in a web browser (e.g., https://your-server-ip:8006).
That’s it. You are ready to start using Proxmox. Take your time getting use to the UI, there is great documentation available at the Proxmox website.

Recent Comments