
How to Download and Install Ubuntu OS for Free: A Comprehensive Guide
Ubuntu, a free and open-source operating system, is a popular choice for desktop and server environments. Whether you’re seeking a powerful Linux alternative to Windows or macOS, interested in exploring new features, or want to set up a robust server, downloading and installing Ubuntu is a straightforward process.
Let’s dive in with our Ubuntu OS Download guide.
Choosing the Right Ubuntu OS Download Version
Before you begin, it’s important to choose a distribution that best suits your needs and preferences. Ubuntu offers several versions, each with specific use cases, from general desktop computing to specialized creative work or server environments.
Let’s explore the most popular options.
Latest LTS Version
(e.g., Ubuntu 24.04 LTS):
Ubuntu’s Long-Term Support (LTS) versions offer stability and five years of free security and maintenance updates.
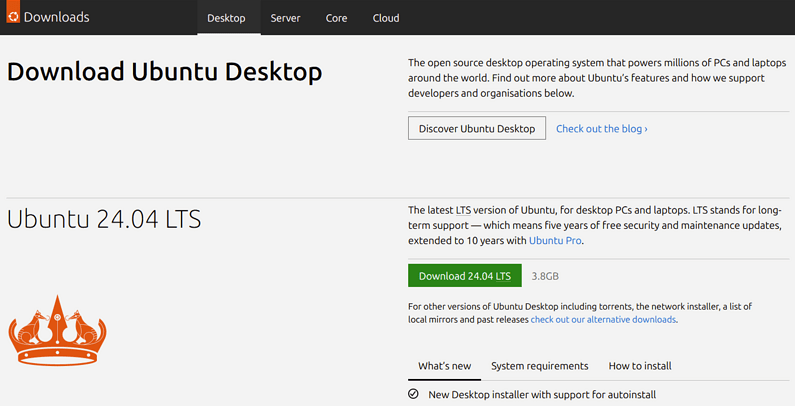
Ubuntu 24.04 LTS is the most recent LTS version, optimized for desktop PCs and laptops.
You can download the 6GB Ubuntu image directly from the Ubuntu website, along with alternative options like torrents and network installers.
Preparing for Ubuntu OS Download
Step 1 – Check the System Requirements:
Ubuntu is designed to run on practically any hardware you have. Needless to say, your experience will vary depending on the resources you have available.
The official specs are:
Ubuntu Desktop:
- Processor: 2 GHz dual-core processor or better
- RAM: 4 GB of system memory
- Storage: 25 GB of free hard drive space
- Display: VGA capable of 1024×768 screen resolution
- Graphics: 3D acceleration capable video card with at least 256 MB for GNOME
- Additional: CD/DVD drive or USB port for installation media, internet access recommended
Ubuntu Server:
- Processor: Varies depending on architecture (64-bit Intel/AMD, 64-bit Arm, 32-bit Arm, etc.)
- RAM: 1 GB minimum, 3 GB or more recommended
- Storage: 5 GB (ISO installs), 4 GB (cloud images), 25 GB or more recommended
It’s important to note that these are just the minimum requirements. For optimal performance, especially if you plan to run resource-intensive applications or virtual machines, you’ll want to exceed these specifications.
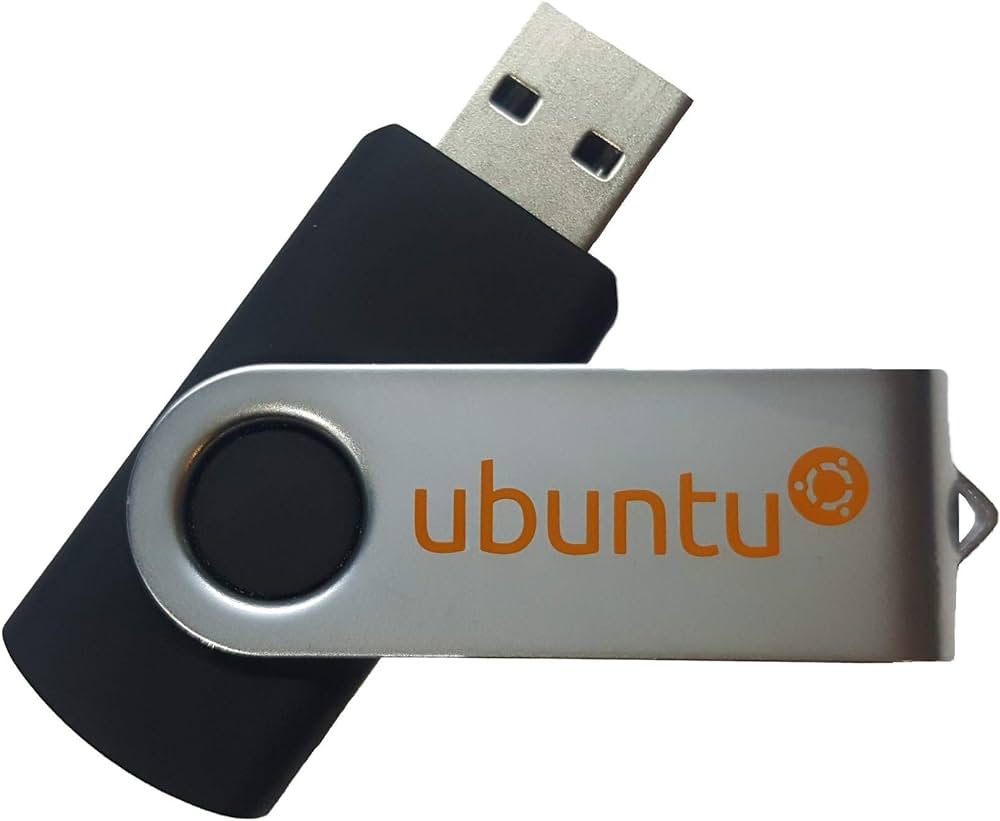
Step 2 – Have a USB Stick Available
The recommended method for installing Ubuntu is using a bootable USB stick.
You’ll need a USB drive with enough space (at least 4GB) and software like Rufus or Etcher to create the bootable media.
Step 3 – Download Ubuntu
Now you are ready to download Ubuntu. You can download various versions directly from Ubuntu. I have provided direct links to the latest versions below:
Desktop Image:
Choose this option to try Ubuntu directly from the USB without altering your current operating system.
Server Install Image:
If you intend to set up an Ubuntu server, this image is tailored for that purpose (it won’t have a graphical desktop).
Step 4 – Write the Ubuntu Image to USB
The next step is to write the Ubuntu image file to a USB stick. There are lots of different ways of how to do this, but my favourite tool is called rufus. Its available on Windows.
Download Rufus:
- Go to the official Rufus website: https://rufus.ie/
- Click on the “Download” button.
- Choose the latest version suitable for your system (likely the portable version).
Install Rufus (Portable Version):
- Rufus is portable, so no installation is needed.
- Double-click the downloaded file to open it.
Prepare Your ISO Image and USB Drive:
- Have your ISO file (e.g., Ubuntu) ready.
- Insert the USB drive you want to make bootable.
Using Rufus:
- Device:
Rufus should automatically detect your USB drive. If not, select it from the dropdown menu. - Boot selection:
Click “SELECT” and choose your ISO file. - Image option:
Leave this as “Standard Ubuntu installation” unless you have a specific reason to change it. - Partition scheme:
- Choose “MBR” for BIOS or UEFI compatibility.
- Choose “GPT” if your computer only supports UEFI.
- Target system:
Let Rufus automatically detect or choose “BIOS or UEFI”. - File system:
- For Ubuntu, choose “FAT32”.
- For Ubuntu, choose “FAT32”.
- Cluster size:
Leave it at the default. - New volume label:
(Optional) Give your USB drive a name. - Format options:
- Check “Quick format” for a faster process.
- Check “Create extended label and icon files” if you want a custom icon for your USB drive.
- Click “START”:
Rufus will warn you that all data on the USB drive will be erased. Click “OK” to confirm.
5. Wait for Completion:
- Rufus will show a progress bar. Wait for it to finish.
- Once complete, you’ll see “Ready” in the status bar. You can now close Rufus and safely eject your USB drive.
Step 5 – Boot and Install Ubuntu
Booting from USB:
- Insert USB:
Plug the bootable Ubuntu USB stick into a free port on your computer. - Restart:
Restart your computer. - Boot Menu:
As your computer starts, you’ll need to enter the boot menu (or BIOS/UEFI settings).- The key to press varies depending on the computer manufacturer (e.g., F12, Esc, Delete). Look for a message on the screen during startup that tells you which key to press.
- The key to press varies depending on the computer manufacturer (e.g., F12, Esc, Delete). Look for a message on the screen during startup that tells you which key to press.
- Select USB:
In the boot menu, you’ll see a list of boot devices. Use the arrow keys to select your USB drive (usually identified by its brand name or as “UEFI: [USB name]”). - Press Enter:
Press Enter to boot from the selected USB drive.
Ubuntu Options:
You’ll see a screen with the following options:
- Try Ubuntu without installing:
This lets you run Ubuntu directly from the USB stick without making any changes to your computer. It’s a great way to test out Ubuntu before installing. - Install Ubuntu:
This option guides you through the process of installing Ubuntu on your computer. You can choose to:
- Install alongside your current operating system (dual boot):
This keeps your existing operating system and adds Ubuntu as another option when you start your computer. - Erase the disk and install Ubuntu:
This completely removes your current operating system and replaces it with Ubuntu. - Something else:
This option gives you more control over the installation process, allowing you to manually partition your disk (advanced).
- Install alongside your current operating system (dual boot):
- Try Before Installing:
- The Ubuntu desktop image allows you to boot your computer from a USB and explore Ubuntu’s features without permanently installing it.
- This is a great way to test compatibility and get a feel for the operating system before making a decision.
- Fresh Installation:
- Once you’re ready, you can install Ubuntu alongside your existing operating system (dual boot) or replace it entirely.
- The installation process is user-friendly. It guides you through partitioning your disk, selecting your language and keyboard layout, and creating a user account.
Ubuntu OS Download: Your Questions Answered
This Q&A section addresses common questions about downloading and installing the Ubuntu operating system.
Q: What is Ubuntu?
A: Ubuntu is a free and open-source operating system based on Linux. It’s a popular alternative to Windows and macOS, known for its stability, security, and customizability. It’s used in both desktop and server environments.
Q: What are the different Ubuntu versions available?
A: Ubuntu offers various versions tailored to different needs. The most common are:
- LTS (Long-Term Support) versions: These are recommended for most users. They receive five years of security and maintenance updates, providing stability and reliability. The latest LTS version is generally recommended for desktop use.
- Other versions: Ubuntu also releases interim versions with newer features, but these are supported for a shorter period.
Q: Which Ubuntu version should I download?
A: For desktop users seeking stability, the latest LTS version (e.g., Ubuntu 24.04 LTS) is typically the best choice. If you need the absolute latest features and are comfortable with more frequent updates, you can explore the non-LTS releases. For server use, the latest LTS server image is recommended.
Q: What are the system requirements for Ubuntu?
A: The minimum system requirements for Ubuntu Desktop are:
- 2 GHz dual-core processor or better
- 4 GB RAM
- 25 GB free hard drive space
- VGA capable of 1024×768 screen resolution
- 3D acceleration capable video card with at least 256 MB for GNOME
- CD/DVD drive or USB port, internet access recommended
For Ubuntu Server, the requirements are:
- Processor: Varies depending on architecture
- RAM: 1 GB minimum, 3 GB or more recommended
- Storage: 5 GB (ISO installs), 4 GB (cloud images), 25 GB or more recommended
For optimal performance, exceeding these minimums is recommended.
Q: How do I download Ubuntu?
A: You can download Ubuntu from the official Ubuntu website. Direct links to the latest desktop and server versions are usually provided on the download page.
Q: What is a bootable USB stick, and why do I need one?
A: A bootable USB stick is a USB drive that contains the Ubuntu installation files, formatted in a way that allows your computer to start from it. This is the recommended method for installing Ubuntu.
Q: How do I create a bootable USB stick?
A: You’ll need a USB drive (at least 4GB) and software like Rufus (Windows) or Etcher (cross-platform). Download the Ubuntu ISO file, then use the software to write the ISO image to the USB drive.
Q: What is Rufus, and where can I download it?
A: Rufus is a free tool for creating bootable USB drives. You can download it from the official Rufus website (https://rufus.ie/).
Q: How do I boot my computer from the USB stick?
A: Insert the USB stick, restart your computer, and enter the boot menu (usually by pressing F12, Esc, Delete, or another key during startup – the specific key depends on your computer’s manufacturer). Select the USB drive from the boot menu.
Q: What is the difference between “Try Ubuntu” and “Install Ubuntu”?
A: “Try Ubuntu” lets you run Ubuntu directly from the USB without installing it on your hard drive. This is great for testing Ubuntu before installing. “Install Ubuntu” guides you through the process of installing Ubuntu on your computer.
Q: What are the installation options?
A: During installation, you can choose to:
- Install Ubuntu alongside your existing operating system (dual boot).
- Erase the disk and install Ubuntu (this will remove your current operating system).
- Use the “Something else” option for advanced partitioning.
Q: Where can I find an Ubuntu installation guide?
A: You can find easy-to-follow Ubuntu installation guides online, including resources that provide step-by-step instructions with screenshots. (You can even mention your own guide here if you have one).
Q: What if I have more questions?
A: The Ubuntu community is very active and helpful. You can find forums, mailing lists, and other resources where you can ask questions and get help with Ubuntu.
If you want an easy-to-follow Ubuntu Installation guide – check out our guide here.

Recent Comments