Migrate VMware workloads to Azure
Migrating Production workloads is a big task. One that requires planning and consideration. If you are taking on an Azure Migrate task as part of your business, be aware that this should be project managed with clear guidelines and goal objectives.
Azure Migrate Planning and Assessment
Azure migrate is the product used to migrate HyperV, VMware, Physical, and Other Cloud servers into Azure. Each migration must have a project; you can either have one big project with everything in it or, as I prefer, have multiple projects broken down into VMware, Hyper, and Physical
Step 1 – Create an Azure Migrate Project
The first thing you need to do is:
Create is an Azure migration project
Set up your migration tools.
- Open the Azure Portal and search for the Azure Migrate blade.

- Find the Servers button underneath the Migration Goals menu on the Azure Migrate blade.
IMPORTANT: The servers area should be blank if you haven’t dabbled with Azure Migrate before. If you have stuff in there, press the change button at the top right next to migrate the project.

- On the next menu, Settings, locate the click here button to create a new project.
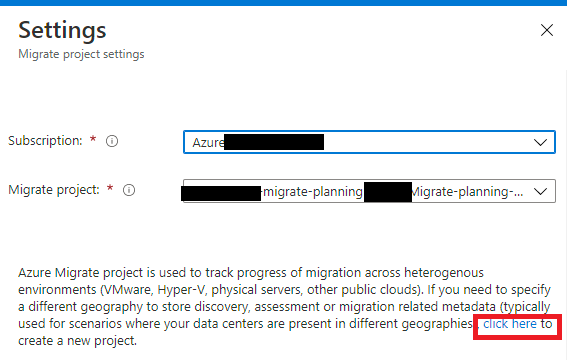
On the next page:
- Select Your Subscription
- Select or Create a New Resource Group
- Give your project a name
- Set the Geography
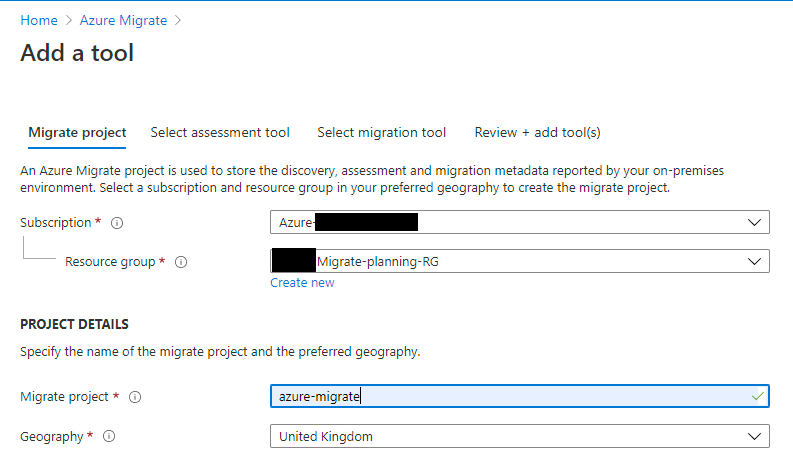
- On the select assessment tool tab – choose your assessment product; in this article, I will be using Azure Migrate: Server Assessment.
- On the select migration tool tab – choose your migration product; in this article, I will be using Azure Migrate: Server Migration.
- On the review tab click the Add Tools button to deploy your config to Azure Migrate
Step 2 – Server Assessment discovery process
The discovery tool will log all the metadata about your VMware installation. It can also provide cost and readiness data and assess your infrastructure dependencies.
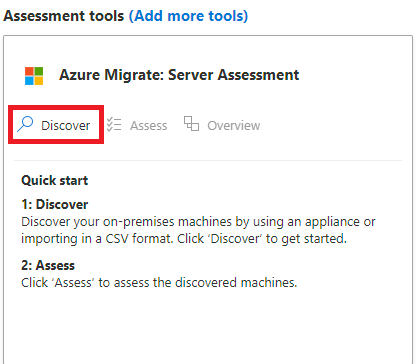
- Click the discover button on Azure Migrate: Server Assessment.
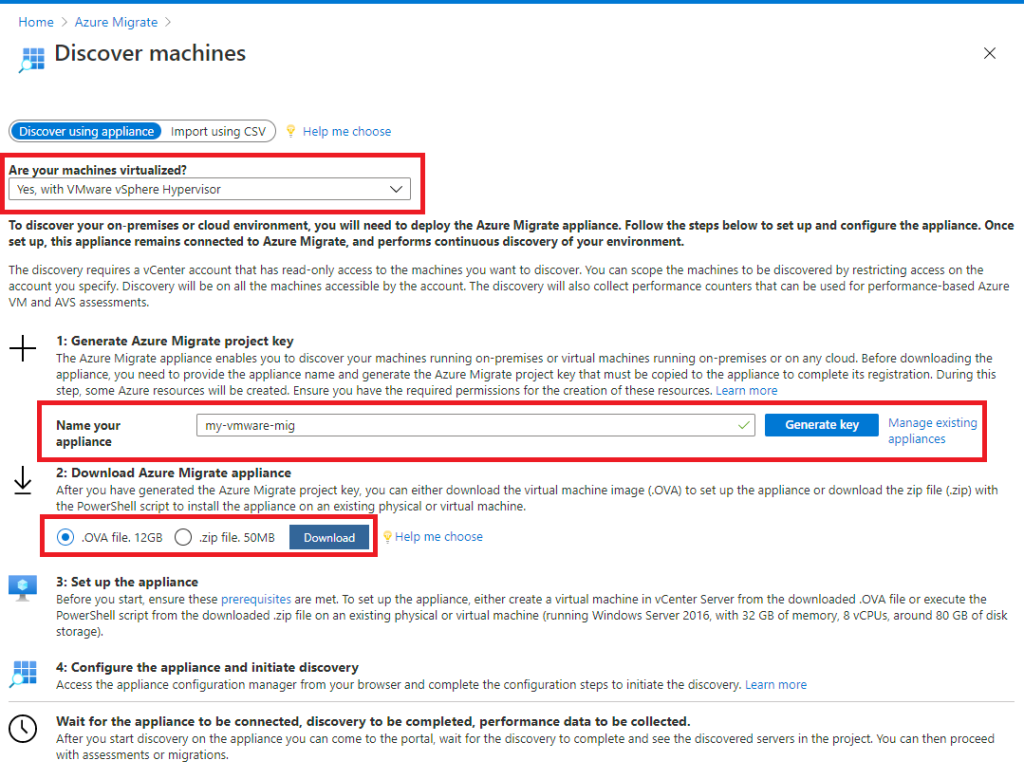
On the Discover Machine menu
- Set Are your machines virtualized to Yes, with VMware vSphere Hypervisor
- Give your appliance a name on Name your Appliance.
- Generate a Key
- Download the OVA package.
- Install the OVA on your VMWare vCenter estate (I will assume you already know how to do this)
Step 3 – Configure the Azure Migrate Assessment Appliance
- Boot the VMware Appliance you have installed via the OVF
- Log into the remote console
- Set the server’s local Administrator password
- Give the server and IP Address, Subnet and Gateway
- Launch the Appliance Configuration Manager; it should launch automatically; if not, there is a shortcut on the desktop
- The appliance will run through some initial checks.
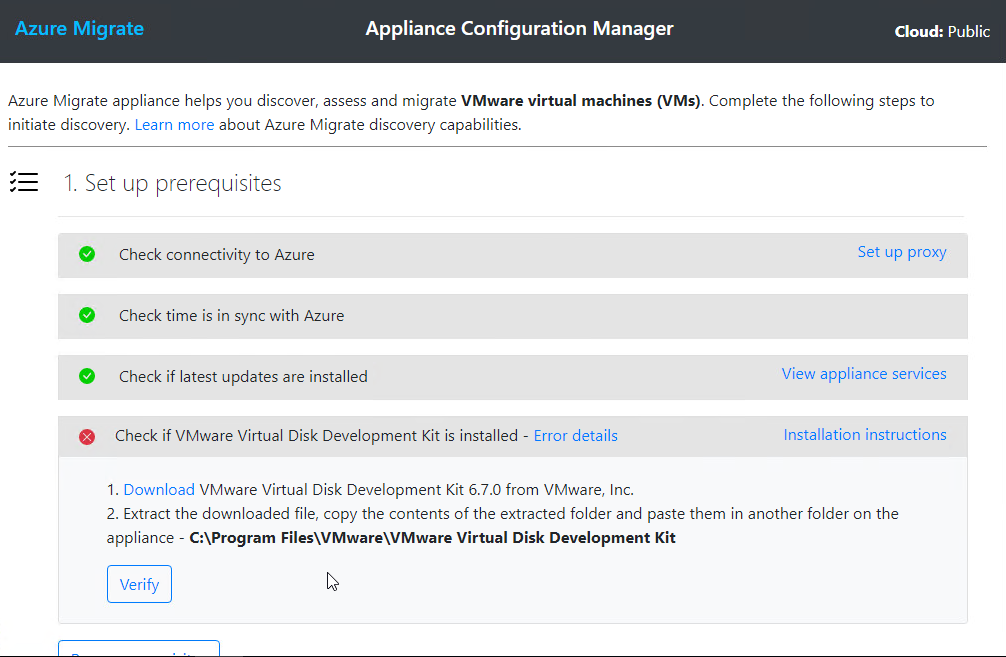
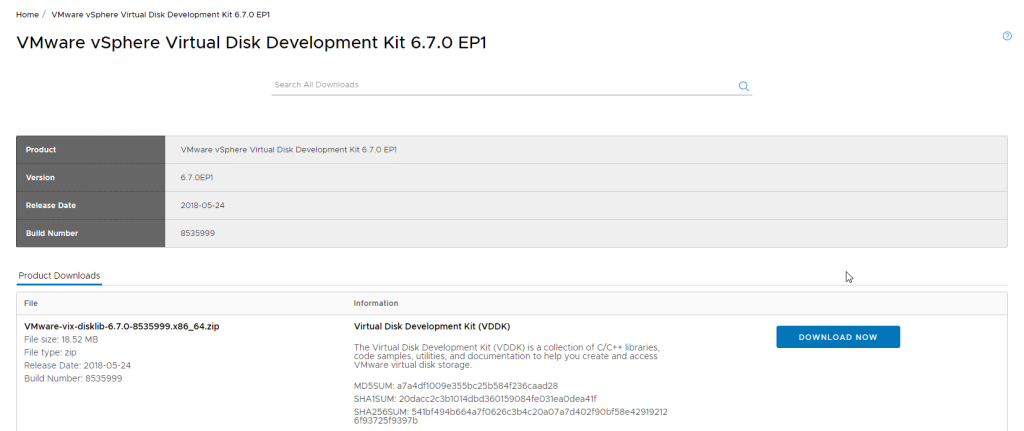
- As per the picture above, I needed to install the VMware Virtual Disk Dev kit. Simply click the download link, log in to VMware.com, download, and copy the files into C:\Program Files\VMWare\VMware Virtual Disk Development Kit\
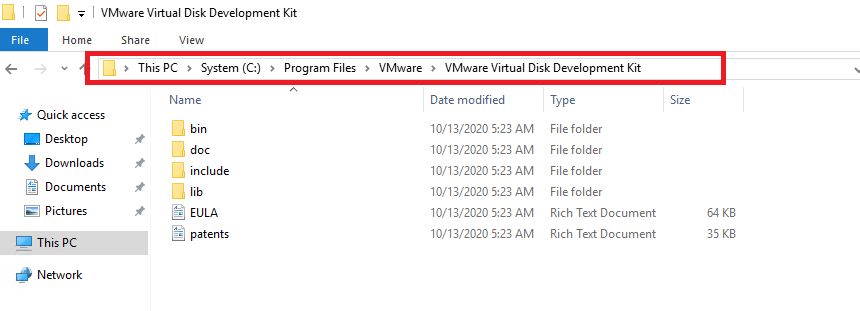
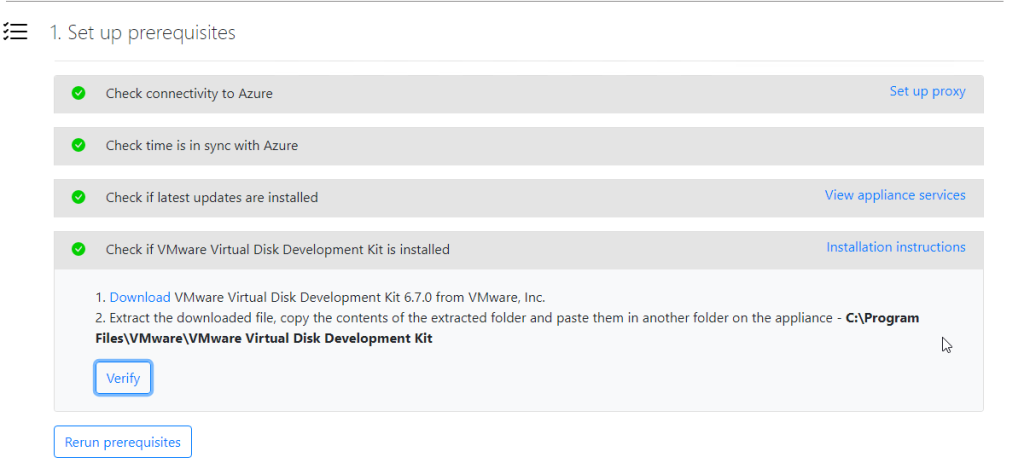
- Once completed, click the verify button.

- Next, copy the Project Key that was created in Step 2 and click LOGIN
- You will be prompted for your Azure Credentials and password to link to PowerShell CLI on the appliance.

Note: You MUST have an account that has permission to create an Azure AD App

- When the Appliance Registration process has finished, the Add Credentials button will become active.

Set the following
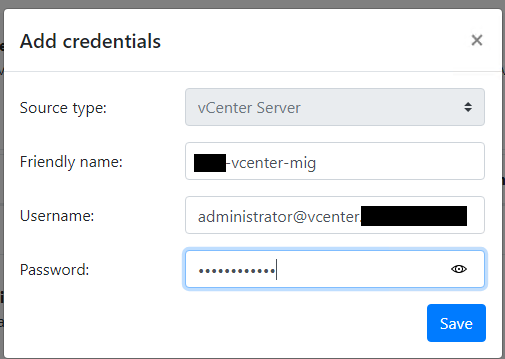
- Set Source Type as vCenter Server
- Set a friendly name as anything you want
- Set the Username and Password
Note: The account must have root access to vCenter. I will be using the default Administrator account.
Note: You may need to refresh the webpage to get the change to pick up

- Next, click the Add Discovery Source – enter your details (this is your vCenter Server Appliance IP Address)


- Next, click the Add Credentials button. I will add my Linux sudo root account for ansible; this is because it is already configured on the estate

- Next, Click the Start Discovery button.
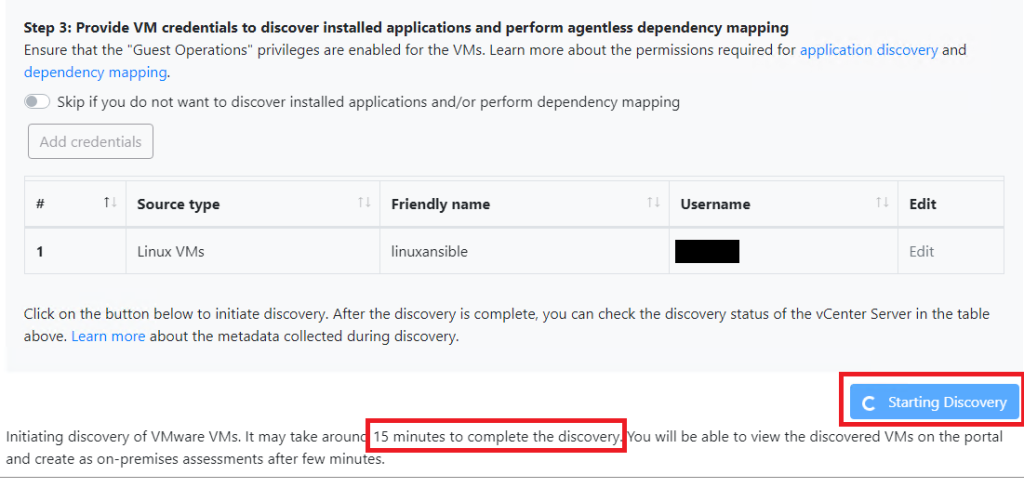
- Upon completion, you will see this message.

That’s it, go to your DISCOVERED ITEMS in Azure migrate, and your data will be available
Azure Migrate Background Reading:
There are four steps to the migration:
Current State analysis
To do this, it is recommended that you have a clear understanding of your infrastructure’s current state. This includes information about the CPU, Disk, and Memory utilization and volumetric data and dependencies. This is not an easy task, but it is essential to migrate successfully.
There are many ways to do this; automated tools such as Dynatrace are great but very expensive. Another way is to install the Microsoft MMA agents on your Windows and Linux infrastructure and then gather metrics from Azure Log Analytics.
Design State
A design state can be started using the information gathered from the Current State Analysis. This is where a final decision is made on what can be migrated, what cannot be migrated, and what can be migrated with amendments being made.
Migrate
This is the technical process of physically migrating servers, and you will need to ensure you have the Microsoft migration appliances installed and ready to go. This procedure will explain exactly how to do this.
Cloudify
Once your infrastructure is migrated to the cloud, the process of tuning the infrastructure begins. You may often find that the cloud servers are over-specced; they might need auto-scaling options added. The cloudify process can take months or years to complete.
Starting Migration Planning and Migration Assessment
First, ask yourself:
What is moving to Azure?
What do you want to take with you?
Where are you going to in Azure?
What is driving the move?
Start Planning
Planning Planning Planning. It is so important. You cannot just lift and shift workloads into Azure, technically you can, but professionally it is a bad idea. Azure is expensive, and your costs will be extortionate if you lift and shift.
You need to work out:
What can be migrated in its current state?
What can be re-architected? (for example, transform a Web Server to a Web App)
What will not migrate? there is always one server, physical appliance, or something that will cause you major headaches.
The Microsoft Migration Plan

- Strategy – define what success looks like including both business and technical goals
- Planning – map out what needs to be migrated and how the strategy will be achieved
- Preparation – prepare both the source and the destination for the migration
- Migration – replicate servers from the source to the destination, perform a cutover
- Handover – handover the final solution to the operations team for ongoing maintenance
Useful Reading



2 Responses
[…] 2008 R2. Microsoft will provide free security updates if you migrate your server to Microsoft Azure. Alternatively, you can purchase the updates directly from Microsoft, but be aware it isn’t […]
[…] Terraform in Azure […]