How to Install Jira from Atlassian on Ubuntu
Atlassian Jira is one of the best ticketing systems available. It is a powerful tool for issue tracking and project management. Founded in 2002, it has grown into a comprehensive platform that works best in an Agile development environment. Let’s now learn how to Install Jira!
Jira allows users to create, assign, track, and resolve issues (tasks, bugs, requests, etc.) efficiently. It offers tools for planning, organizing, and tracking project progress. Users can create project boards (using Scrum or Kanban methodologies), roadmaps, and reports to visualize and manage project activities effectively.
Ready to install Jira for free? At the time of writing the latest version was v9.15
Step1 – Install all Prerequisites for Jira
- First, install Java JDK
apt update -y
apt-get install openjdk-11-jre -y
You will see the following output:
Reading package lists... Done
Building dependency tree... Done
Reading state information... Done
The following additional packages will be installed:
  alsa-topology-conf alsa-ucm-conf at-spi2-core ca-certificates-java dconf-gsettings-backend dconf-service
  fontconfig-config fonts-dejavu-core fonts-dejavu-extra gsettings-desktop-schemas java-common libasound2
  libasound2-data libatk-bridge2.0-0 libatk-wrapper-java libatk-wrapper-java-jni libatk1.0-0 libatk1.0-data
  libatspi2.0-0 libavahi-client3 libavahi-common-data libavahi-common3 libcups2 libdconf1 libdrm-amdgpu1
  libdrm-intel1 libdrm-nouveau2 libdrm-radeon1 libfontconfig1 libfontenc1 libgif7 libgl1 libgl1-amber-dri
  libgl1-mesa-dri libglapi-mesa libglvnd0 libglx-mesa0 libglx0 libgraphite2-3 libharfbuzz0b libice6
  libjpeg-turbo8 libjpeg8 liblcms2-2 libllvm15 libpciaccess0 libpcsclite1 libsensors-config libsensors5
  libsm6 libx11-6 libx11-xcb1 libxaw7 libxcb-dri2-0 libxcb-dri3-0 libxcb-glx0 libxcb-present0 libxcb-randr0
  libxcb-shape0 libxcb-shm0 libxcb-sync1 libxcb-xfixes0 libxcomposite1 libxfixes3 libxft2 libxi6
  libxinerama1 libxkbfile1 libxmu6 libxpm4 libxrandr2 libxrender1 libxshmfence1 libxt6 libxtst6 libxv1
  libxxf86dga1 libxxf86vm1 openjdk-11-jre-headless session-migration x11-common x11-utils
Suggested packages:
  default-jre libasound2-plugins alsa-utils cups-common liblcms2-utils pcscd lm-sensors libnss-mdns
  fonts-ipafont-gothic fonts-ipafont-mincho fonts-wqy-microhei | fonts-wqy-zenhei fonts-indic mesa-utils
The following NEW packages will be installed:
  alsa-topology-conf alsa-ucm-conf at-spi2-core ca-certificates-java dconf-gsettings-backend dconf-service
  fontconfig-config fonts-dejavu-core fonts-dejavu-extra gsettings-desktop-schemas java-common libasound2
  libasound2-data libatk-bridge2.0-0 libatk-wrapper-java libatk-wrapper-java-jni libatk1.0-0 libatk1.0-data
  libatspi2.0-0 libavahi-client3 libavahi-common-data libavahi-common3 libcups2 libdconf1 libdrm-amdgpu1
  libdrm-intel1 libdrm-nouveau2 libdrm-radeon1 libfontconfig1 libfontenc1 libgif7 libgl1 libgl1-amber-dri
  libgl1-mesa-dri libglapi-mesa libglvnd0 libglx-mesa0 libglx0 libgraphite2-3 libharfbuzz0b libice6
  libjpeg-turbo8 libjpeg8 liblcms2-2 libllvm15 libpciaccess0 libpcsclite1 libsensors-config libsensors5
  libsm6 libx11-xcb1 libxaw7 libxcb-dri2-0 libxcb-dri3-0 libxcb-glx0 libxcb-present0 libxcb-randr0
  libxcb-shape0 libxcb-shm0 libxcb-sync1 libxcb-xfixes0 libxcomposite1 libxfixes3 libxft2 libxi6
  libxinerama1 libxkbfile1 libxmu6 libxpm4 libxrandr2 libxrender1 libxshmfence1 libxt6 libxtst6 libxv1
  libxxf86dga1 libxxf86vm1 openjdk-11-jre openjdk-11-jre-headless session-migration x11-common x11-utils
The following packages will be upgraded:
  libx11-6
1 upgraded, 82 newly installed, 0 to remove and 205 not upgraded.
Need to get 88.2 MB/88.9 MB of archives.
After this operation, 368 MB of additional disk space will be used.
Do you want to continue? [Y/n]
Step 2 – Download Jira Core Data Center
- Download Jira Core datacenter version 9.15 (this is the latest version at the time of writing)
curl -L -O https://www.atlassian.com/software/jira/downloads/binary/atlassian-jira-software-9.15.2-x64.bin- You will see output like this
root@AIML:~# curl -L -O https://www.atlassian.com/software/jira/downloads/binary/atlassian-jira-software-9.15.2-x64.bin
  % Total    % Received % Xferd  Average Speed   Time    Time     Time  Current
                                 Dload  Upload   Total   Spent    Left  Speed
100   166  100   166    0     0   1026      0 --:--:-- --:--:-- --:--:--  1031
100  597M  100  597M    0     0  21.7M      0  0:00:27  0:00:27 --:--:-- 22.2M
root@AIML:~#
Step 3 – Install Jira
- Add the execute permission to your download Jira Bin file.
sudo chmod +x atlassian-jira-software-9.15.2-x64.bin- Now install JIRA
./atlassian-jira-software-9.15.2-x64.bin - Follow the onscreen instructions to customize your JIRA install
This is how I answered the onscreen prompts:
- This will install Jira Software 9.15.2 on your computer. OK [o, Enter], Cancel [c] – ENTER
- Express Install (use default settings) [1], Custom Install (recommended for advanced users) [2, Enter], Upgrade an existing Jira installation [3] – 1
- Install as service – Yes
- Start Jira Software 9.15.2 now? Yes [y, Enter], No [n] – ENTER
root@AIML:~# ./atlassian-jira-software-9.15.2-x64.bin
We couldn't find fontconfig, which is required to use OpenJDK. Press [y, Enter] to install it.
For more info, see https://confluence.atlassian.com/x/PRCEOQ

Installing fontconfig...
Hit:1 http://us.archive.ubuntu.com/ubuntu jammy InRelease
Hit:2 http://us.archive.ubuntu.com/ubuntu jammy-updates InRelease
Hit:3 http://us.archive.ubuntu.com/ubuntu jammy-backports InRelease
Hit:4 http://us.archive.ubuntu.com/ubuntu jammy-security InRelease
Reading package lists... Done
Building dependency tree... Done
Reading state information... Done
251 packages can be upgraded. Run 'apt list --upgradable' to see them.
Reading package lists... Done
Building dependency tree... Done
Reading state information... Done
The following NEW packages will be installed:
  fontconfig
0 upgraded, 1 newly installed, 0 to remove and 251 not upgraded.
Need to get 177 kB of archives.
After this operation, 384 kB of additional disk space will be used.
Get:1 http://us.archive.ubuntu.com/ubuntu jammy/main amd64 fontconfig amd64 2.13.1-4.2ubuntu5 [177 kB]
Fetched 177 kB in 0s (952 kB/s)
Selecting previously unselected package fontconfig.
(Reading database ... 74948 files and directories currently installed.)
Preparing to unpack .../fontconfig_2.13.1-4.2ubuntu5_amd64.deb ...
Unpacking fontconfig (2.13.1-4.2ubuntu5) ...
Setting up fontconfig (2.13.1-4.2ubuntu5) ...
Regenerating fonts cache... done.
Processing triggers for man-db (2.10.2-1) ...
Scanning processes...
Scanning linux images...

Running kernel seems to be up-to-date.

No services need to be restarted.

No containers need to be restarted.

No user sessions are running outdated binaries.

No VM guests are running outdated hypervisor (qemu) binaries on this host.
Unpacking JRE ...
Starting Installer ...

This will install Jira Software 9.15.2 on your computer.
OK [o, Enter], Cancel [c]

Click Next to continue, or Cancel to exit Setup.

Choose the appropriate installation or upgrade option.
Please choose one of the following:
Express Install (use default settings) [1], Custom Install (recommended for advanced users) [2, Enter], Upgrade an existing Jira installation [3]
1

Details on where Jira Software will be installed and the settings that will be used.
Installation Directory: /opt/atlassian/jira
Home Directory: /var/atlassian/application-data/jira
HTTP Port: 8080
RMI Port: 8005
Install as service: Yes
Install [i, Enter], Exit [e]


Extracting files ...

/opt/atlassian/jira/bin/tcnative-1.dll

The file already exists.

Would you like Setup to overwrite it?
Yes [y], Yes to All [ya], No [n], No to All [na]
ya

Please wait a few moments while Jira Software is configured.

Start Jira Software 9.15.2 now?
Yes [y, Enter], No [n]
y

Please wait a few moments while Jira Software starts up.
Launching Jira Software ...

Your installation of Jira Software 9.15.2 is now ready and can be accessed
via your browser.
Jira Software 9.15.2 can be accessed at http://localhost:8080
Finishing installation ...
Step 4 – Browse to Jira to complete Installation
Now browse to your JIRA installation.
http://localhost:8080

or

https://YOUR_IP_ADDRESS:8080
If you have installed on a cloud VPS, browse to the server IP and port 8080
You are given two options:
- Install Automatically (Set it up for me)
- Customize Installation. (I’ll set it up myself)
- Click “I’ll Set it up myself”

Step 5 – Install Jira Database
- On the next page, select “built-in database“. Please note it will take a few minutes to create the database.

- Once Completed, give your Jira application a name, and you can set the URL if needed.

- Next, you will be asked to license JIRA. Make a note of your Server ID.
- If you have a license, enter it here, otherwise click on “generate a trail license”. You will be sent to the Atlassian site, sign up (I just used my Google account), and then request a license.

You will be asked to confirm your IP address of your server, and then you get your licence.

- Next you will be prompted to create an Administrator Account

- If you have an email server you can configure it next

- Now select your language

- Now give yourself an Avatar

- You can now log in, use the Adnministrator credentials created earlier.

Step 6 – Create A New Project
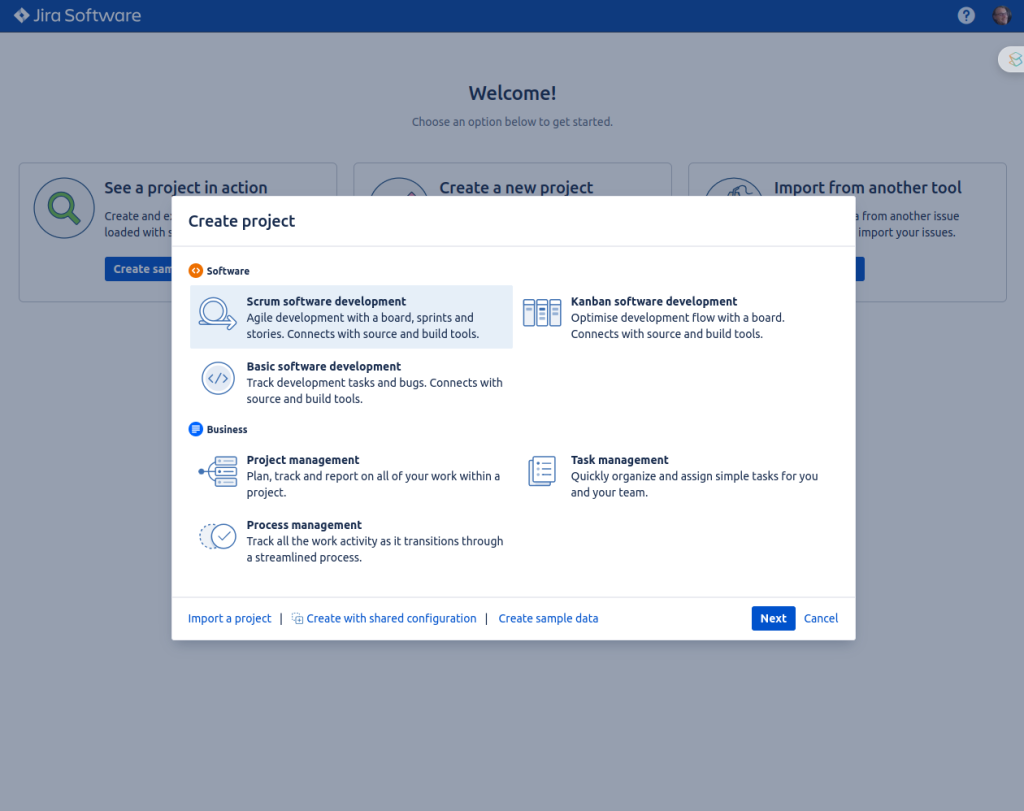
- Select Create a New Project. Im going to select Scrum Software Development


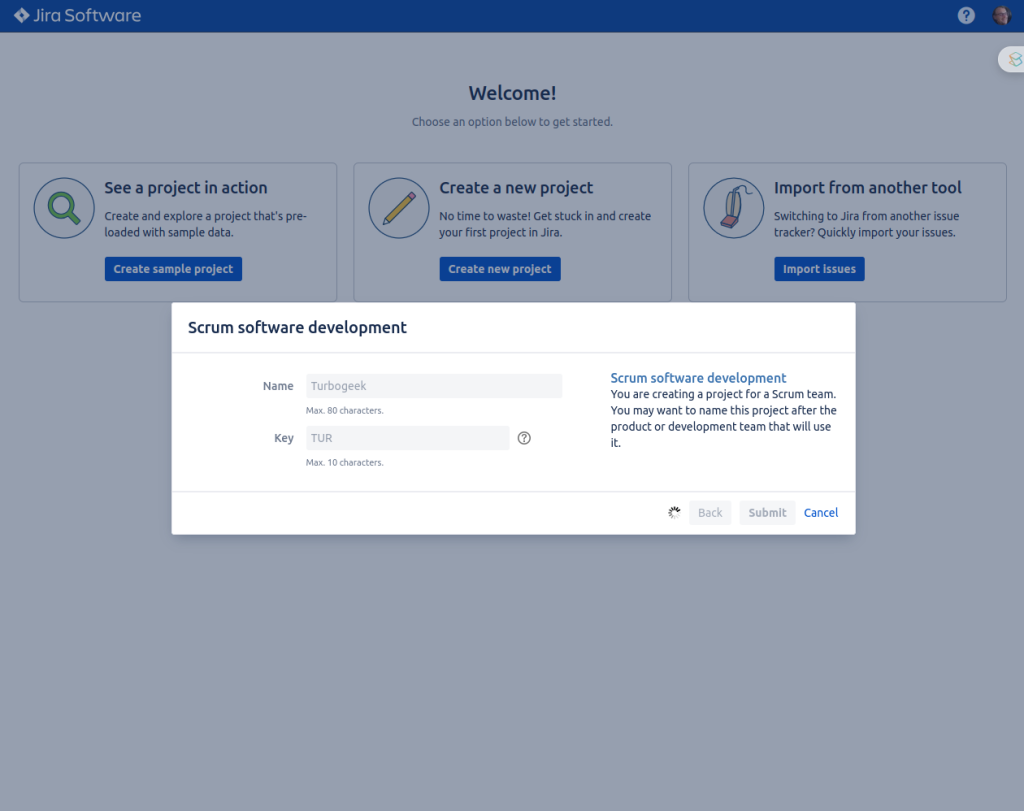
- Give your deployment a name and click submit


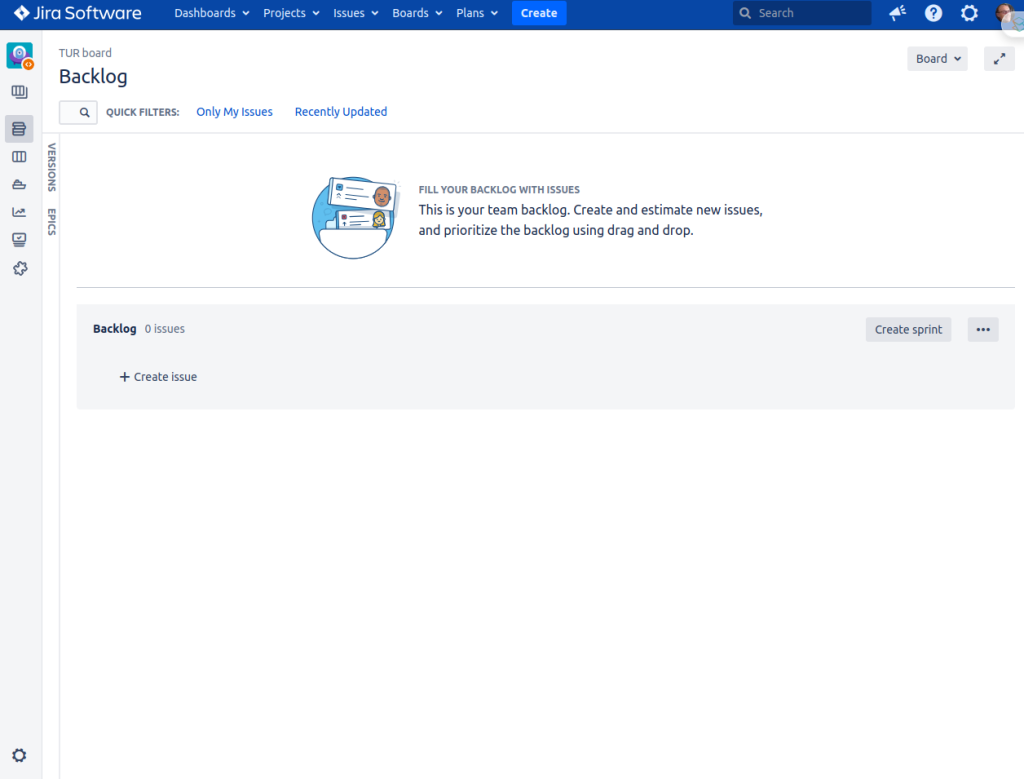
That’s it; you have now created your very own Jira server, which you can use to track incidents, software development cycles, and more. Want to learn more? Check out our Tech Quicky’s
Thanks for taking the time to read this article. if you have any questions or feedback, please write in the comment section below.


Recent Comments