

Key Takeaways
- Effortless Installation: Install Steampipe on macOS in minutes using Homebrew, the standard package manager.
- Seamless AWS Integration: Connect Steampipe to your AWS account by installing the official AWS plugin and configuring it to use your existing AWS SSO profile.
- Instant API Querying: Immediately start running standard SQL queries against AWS APIs to inspect resources like IAM roles, S3 buckets, and EC2 instances without writing complex scripts.
- Interactive Shell: Use the
steampipe querycommand to enter an interactive shell with command history and auto-completion for exploring your cloud environment in real-time.
Steampipe is a powerful open-source command-line tool that instantly transforms APIs into a relational database, allowing you to use standard SQL to query your cloud infrastructure. Instead of learning different CLI tools and scripting languages for each service, you can use a unified SQL interface to explore, monitor, and audit your cloud security posture. If a service has an API, chances are you can query it with Steampipe. This guide focuses on getting you started with Steampipe and the AWS plugin on a macOS machine.
Steampipe is an open-source tool that lets you query cloud infrastructure, APIs, and SaaS services using standard SQL. It works by loading provider plugins (AWS, Azure, GCP, GitHub, and hundreds more) that expose live data as PostgreSQL tables — so you can run SELECT statements against your infrastructure without writing custom scripts.
How Do You Install Steampipe on macOS?
The most straightforward method for installing Steampipe on macOS is by using the Homebrew package manager, which handles dependencies and updates seamlessly.
The process involves two primary commands: one to add the official Turbot repository (the creators of Steampipe) and another to perform the installation.
We recommend installing Homebrew which provides pre-built binaries for Mac.
STEP 1: Tap Turbot’s Cask
This command adds the official source for Steampipe to your Homebrew configuration.
brew tap turbot/tapSTEP 2: Install Steampipe
Now, you can install the Steampipe CLI directly.
brew install steampipeSTEP 3: Version Check
steampipe -v steampipe version 0.10.0STEP 4: Install the AWS plugin
~$ steampipe plugin install aws
Installed plugin: AWS
STEP 5: Configure your profile and SSO access
Important – You will need to re-configure after for SSO token expires – usually 24hrs
From the terminal type:
aws configure sso
SSO start URL [None]: https://<your-url>.awsapps.com/start#/
SSO Region [None]: eu-west-1
This will open your browser, click Allow Access
STEP 6: Select the account you want to use
There are 9 AWS accounts available to you.
< YOUR AWS ACCOUNT DETAILS>
STEP 7: Select the permissions you want>
AdminUser
PowerUser
ReadOnly
STEP 8: Give your profile a name – make it simple
CLI default client Region [eu-west-1]:
CLI default output format [text]:
CLI profile name [AdminUser-xxxxxx]: richard
STEP 9: Edit the steampipes config file
nano ~/.steampipe/config/aws.spc
It should look similar to this:
connection "aws" { plugin = "aws" regions = ["eu-west-1"] profile = "richard"
STEP 10: Start Steampipe
steampipe query
Explore
Steampipe provides commands that allow you to discover and explore the tables and data without leaving the query shell. (Of course this information is all available in the hub if online docs are more your speed…)
Let’s fire up Steampipe! Run
steampipe query
to open an interactive query session:
$ steampipe query
Welcome to Steampipe v0.5.0
For more information, type .help>
Now run the .tables meta-command to list the available tables:
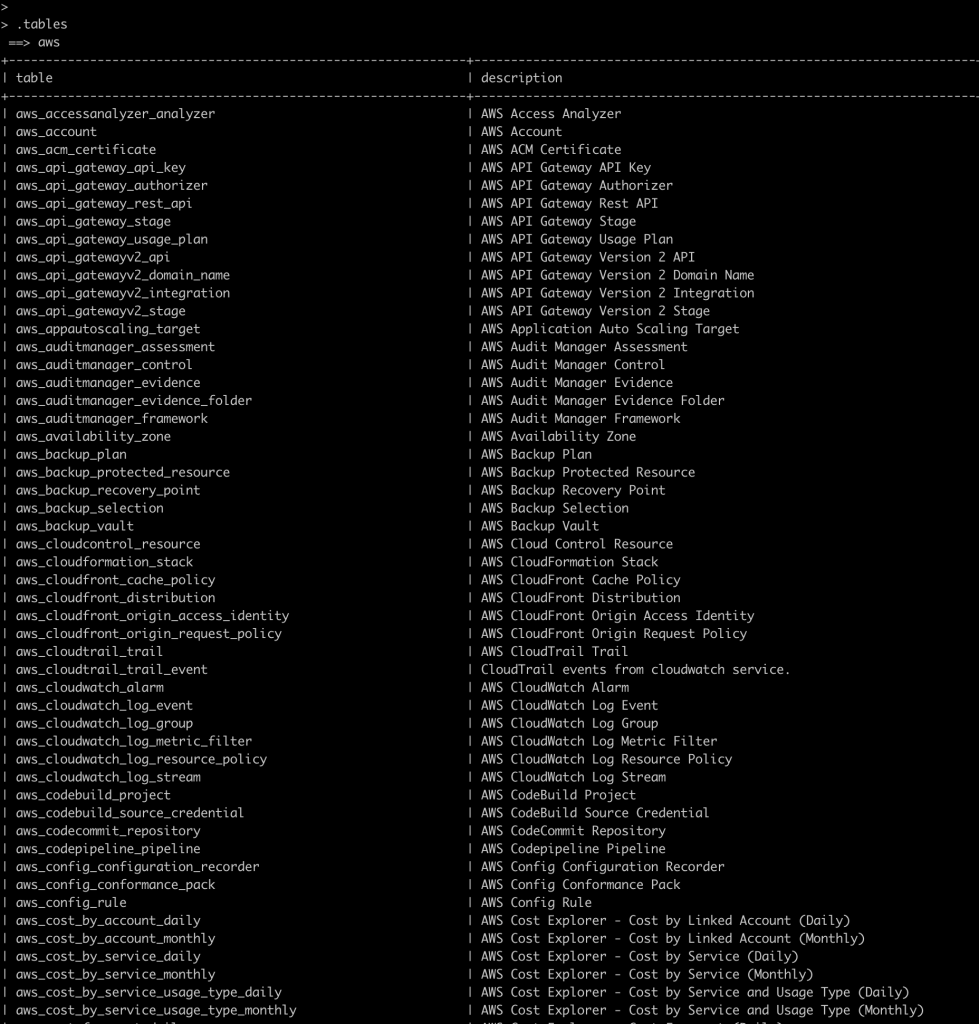
As you can see, there are quite a few tables available in the aws plugin!
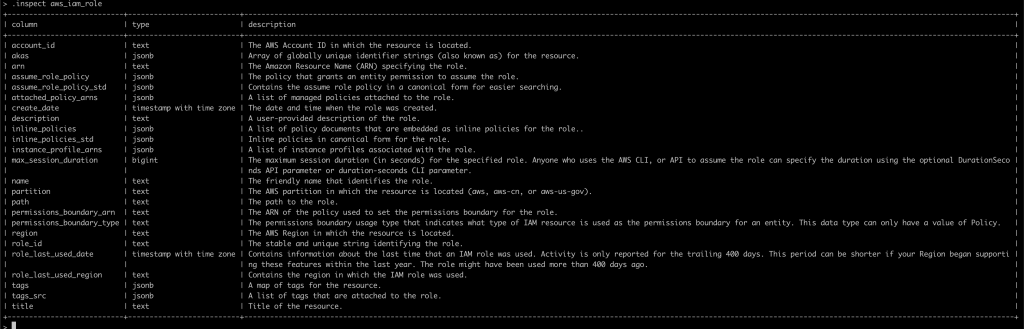
It looks like there’s an aws_iam_role table – let’s run .inspect to see what’s in that table:
.inspect aws_iam_role
History
The query shell supports command history, allowing you to retrieve, run, and edit previous commands. The command history works like typical unix shell command history, and persists across query sessions. When on a new line, you can cycle back through the history with the Up Arrow or Ctrl+p and forward with Down Arrow or Ctrl+n.
Key bindings
The query shell supports standard emacs-style key bindings:
| Keys | Description |
|---|
| Keys | Description |
|---|---|
Ctrl+a | Move the cursor to the beginning of the line |
Ctrl+e | Move the cursor to the end of the line |
Ctrl+f | Move the cursor forward 1 character |
Ctrl+b | Move the cursor backward 1 character |
Ctrl+w | Delete a word backwards |
Ctrl-d | Delete a character forwards. On a blank line, Ctrl-d will exit the console |
Backspace | Delete a character backwards |
Ctrl+p, Up Arrow | Go to the previous command in your history |
Ctrl+n, Down Arrow | Go to the next command in your history |
How do you update Steampipe?
UPDATE STEP 1: Update Homebrew
~$ brew update
UPDATE STEP 2: Update Steampipe
~$ brew upgrade steampipe
Leave a Reply