Installing and Using the Alation Data Catalog
What is the Alation?
The Alation data catalog tool is used to search, query, and collaborate on large data sets, using machine learning to gain insights incredibly quickly. In my environment, I have a Teradata source database that uses clickstream to record user behavior on the website. It tracks everything—clicks on the site, orders, user interaction—everything!
Alation’s enterprise data catalog dramatically improves the productivity of analysts, increases the accuracy of analytics, and drives confident data-driven decision-making while empowering everyone in your organization to find, understand, and govern data.
How does Alation work?
Alation is a web-based application that allows users to connect to various data sources and manage the relationships between them. This can track changes, manage flows, and optimize communication.
Why is Alation important?
Alation is essential for managing data across different systems and optimizing data communication. It can also help track data changes and optimize data flows.
What is the Alation Data Catalog?
The data catalog makes sense of these Petabytes of data sets. It also connects to our AWS Redis Data sources and several on-site PowerBI instances.
What are the Alation Pre-Requisites
The essential tasks ahead of the installation of the Alation Data Catalogue to ensure a successful implementation are:
- Take some time to read the Alation Documentation
- Procure & configure compute instance
- Confirm network rules are in place
- Obtain Alation email account and SMTP server details
- Create DNS entries for Alation URL
- Procure & Configure Analytics V2 compute instance
- Prepare Service Accounts and collect connection details for in-scope data sources
Ports needed for your security group:
| Service | Direction | Ports | Destination |
| DNS | outbound | 53 | DNS Server |
| outbound | 25 | 0.0.0.0/0 | |
| SSH | outbound | 465 | Email server |
| HTTP/HTTPS | inbound | 80 443 | Instance Node |
| Management Console | inbound | 443 | Instance Node |
| LDAP | outbound | 389 | LDAP / AD Server |
| LDAPS | outbound | 636 | LDAP / AD Server |
How to install the Alation Data Catalog
Step 1 – Contact Alation and get a Trail Licence
The first thing you need to do is reach out for a trial license. Other members of the pro did this step for me. You can speak to their sales team to get an idea of the Alation pricing costs.
Alation is also available on the AWS marketplace, where you can demo the product; just be mindful of the costs because it can be pricey.
Step 2 – Build an AWS Instance That Meets the Minimum Requirements of Alation
This guide is a high-level overview of how to install the data catalog.
- Reach out to Alation for Trial Licence and Installation files. An install can be done offline or via RPM or YUM. I would only recommend using Linux.
- Provision a server instance. I did this in AWS – here are the specs:
AWS Instance – M5.2xLarge ( 8 CPU and 32GB RAM)
Step 3 – Configure the Local Instance Storage
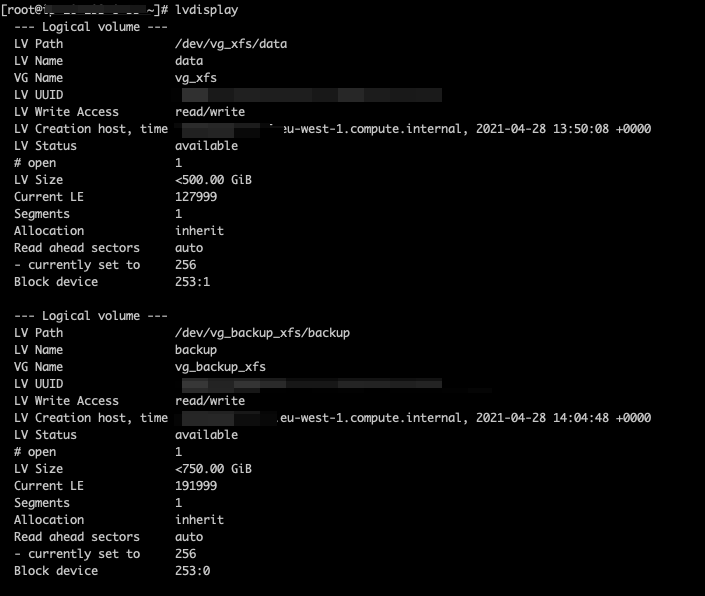
Configure Storage – 3x XFS file system 80GB Root partition, 500GB App Partition, 750GB Backup Partition)
sudo mkdir /data
sudo mkdir /backup
sudo lvcreate -n data vg_xfs
sudo lvcreate -l 100%FREE -n data
sudo vgcreate vg_xfs /dev/nvme2n1
sudo vgcreate vg_backup_xfs /dev/nvme2n1
sudo lvcreate -l 100%FREE -n backup
sudo mkfs.xfs /dev/vg_backup_xfs/backup

/etc/fstab
UUID=xxxxxxxxxxxxxxxxxxxxxxxxxxxxxxxxxxxx     /root           xfs    defaults,noatime  1   1
UUID=xxxxxxxxxxxxxxxxxxxxxxxxxxxxxxxxxxxx     /data xfs    defaults,noatime  1   1
UUID=xxxxxxxxxxxxxxxxxxxxxxxxxxxxxxxxxxxx     /backup xfs defaults,noatime  1   1
Step 4 – Download the Alation Data Catalog Package
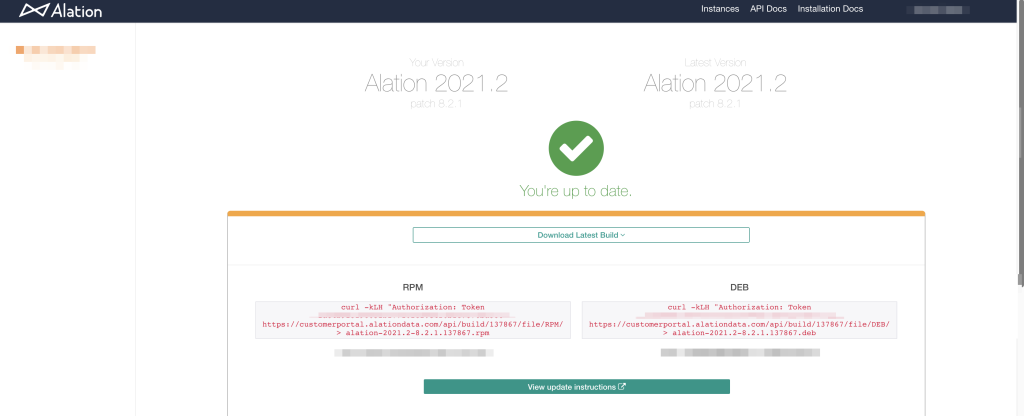
- Download the installation package. This can be done offline using the Customer Portal or via RPM. You can access the code from the Customer Portal.
curl -kLH "Authorization: Token YOUR ACCESS TOKEN" https://customerportal.alationdata.com/api/build/137867/file/RPM/ > alation-2021.2-8.2.1.137867.rpm
Step 5 – Install the Alation Data Catalog Package
- Next, Install the data catalog.
sudo yum update -y
sudo rpm -ivh alation-7.2.5.136994.rpm
sudo service alation init /data /backup
Step 6 – Configure Alation using the Alation Shell
- Now enter the Alation Shell
sudo service alation shell- You can look at the existing configuration by typing.
alation_conf- Here is my recommended configuration
alation_conf alation.profiling.v2.distribution.show_distribution_chart -s True
alation_conf alation.profiling.v2.distribution.max_unbatched_values -s 10
alation_conf alation.profiling.v2.distribution.batch_count -s 10
alation_conf alation.feature_flags.enable_profiling_v2 -s True
alation_conf alation.taskserver_timeouts.profileColumnV2 -s 120
alation_conf alation.feature_flags.enable_gbm_v2_connector_strategy -s True
alation_conf alation.feature_flags.enable_permissions_middleware_feature -s True
alation_conf alation.feature_flags.enable_swagger -s True
alation_conf alation.authentication.token.disable_v0_api_token_auth -s True
alation_conf alation.feature_flags.enable_lineage_v2 -s True
alation_conf alation.backup_v2.incr_backup -s True
alation_conf alation.backup_v2.incr_backup_versions -s 6
alation_conf alation.install.is_trial -s true
alation_conf nginx.use_ssl -s False
Step 7 – Enable Backups
- Now enable backups
alation_action enable_backupv2- Restart the server
alation_action restart_alationStep 8 – Configure an HTTPS to HTTP AWS ALB
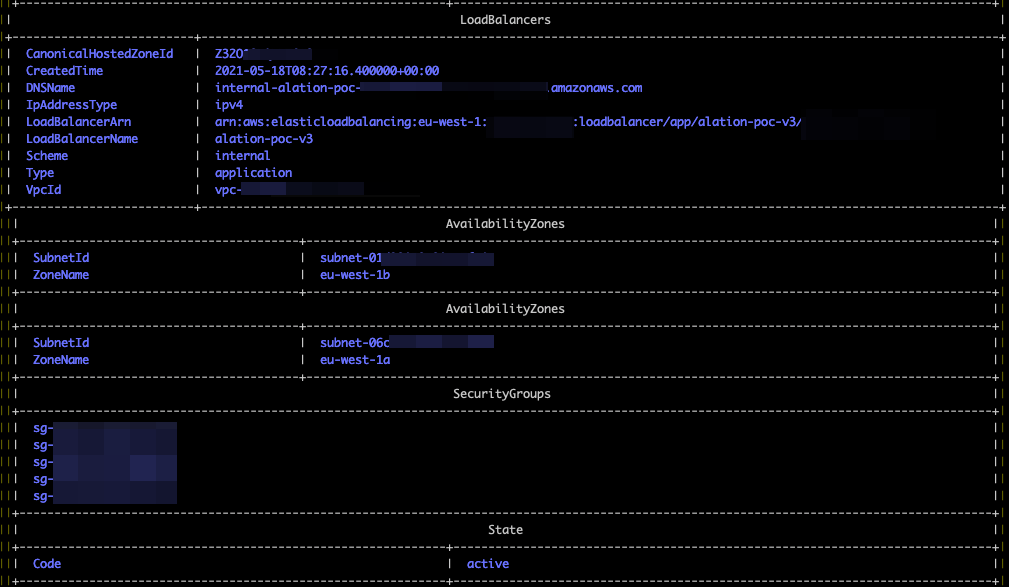
- You now need to configure an AWS application load balancer. Note: It MUST be an Application Load Balancer

You can now access the server via your configured Load Balancer address. Thats it. As usual, please like, comment, and share.


Recent Comments